Do you overbuy and have no idea how to store your fresh mint? Don’t you know what to prepare and what steps to take?
Like other herbs, fresh mint lasts a short-term lifetime and quickly wilt. However, you can approach ways to extend its life expectancy and maintain freshness.
Although mint is well-known, methods for preserving them are rarely discussed. Get to know the following methods, which help you keep mint fresh from several weeks to months. Don’t hurry up! I will gradually unveil detailed instructions in this post.
Let’s discuss them now!

What Is Mint?
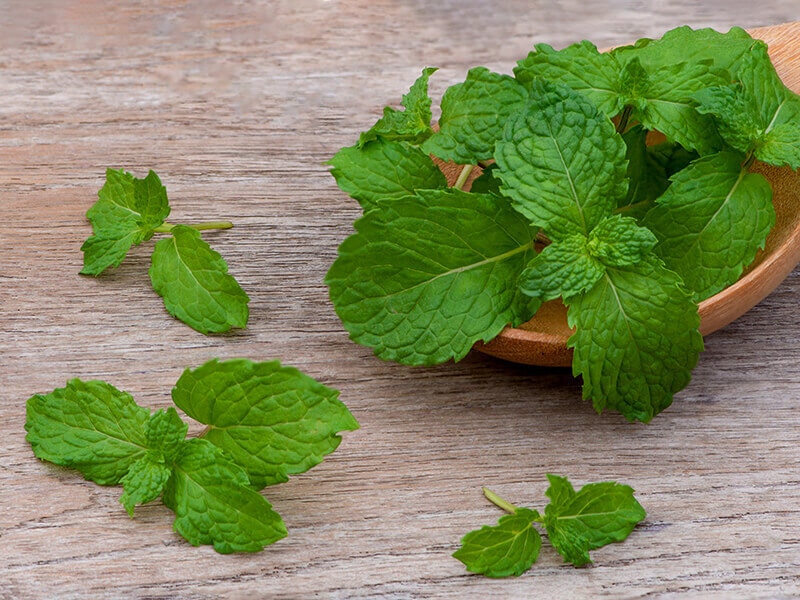
Mint (known scientifically as Mentha) is a herb that often appears as a garnish for foods or beverages. People also use mint leaves for culinary purposes.(1) Other instances for mints are a decent replacement for sage, coriander, and other herbs.
Mint is a herbaceous plant, which was first found in European countries. Mints grow 10-120cm tall. The stems of mint are usually green and turn purple towards the roots in color.
Mint has grown under shaded locations, even indoors; hence you can take it in any season you want. Mints are fast-growing nearby lakes, rivers, or moisture environments. Thus, this is a key for your demand keeping it fresh and lasting long.
Before knowing the guidelines, take a few minutes to glimpse some common types of mint, mint uses, and how this herb benefits your health. I guarantee that it won’t take too much of your time.
Three Mint Uses In Various Fields
How many mint uses have you known before? Have you ever heard about different applications of mint in daily life? Maybe you miss some of it. Take a look at mint uses that you may not know all about to maximize mint use!
Beverages and Culinary
Mint is essential in many exquisite cocktails or foods as a garnish or flavor enhancer. In addition, it’s also a must-have component for different mint-flavored items such as jellies, candies, ice creams, and syrups.
Cosmetics
Mint has the effect of treating acne, and brightening the skin, so mint seems to be the main ingredient in many cosmetic products.
Room Scent
Mint flavor helps stabilize the spirit, bringing a sense of relaxation, so they are processed into many types such as essential oil or scented candles, helping to scent the room and getting a cozy feeling.
Enrich and enhance your fruit and vegetable salad by adding mint. Watch the video:
How Mints Benefit Your Health
I know you’ve known about mint leaves before, but maybe you have never heard about the health purposes of these leaves. Not only are the fresh mint leaves, but also the essential oil made from mint leaves (as known as menthol) brings a lot of benefits. Let’s take a look!
Common Applies
Mint helps support digestion, soothe insect bites, relieve headaches, and support common colds. Using products with menthol will help you relieve stress and improve mental function.
Asthma Treatment
When you have problems with asthma, taking mint leaves frequently can relieve chest tightness and help you breathe easier. However, overuse can affect your air passage.
Skin Beauty Support
Mint also contains many good nutrients that make the body healthy from the inside. You can make detox water with mint ingredients for some time, and you will be surprised by the result.

There are a lot of advantages when taking mint as a treatment for your health, so don’t miss it!
How To Store Fresh Mint?
You must be curious about storing fresh mint now; let’s jump into it! There are several options for your requirement. You can merely store it at room temperature or put mints in the refrigerator, and many other different ways so you will not waste your mints!
Method 1: Store At Room Temperature
Let’s start with storing mint at room temperature. Have you imagined a bushy green bouquet of mint at your home? Or think of mixing mints with sugar or trying out infusions with alcohol? Scroll down for your information.
Option 1: Use A Glass Of Water
Store your mint leaves in a glass of water just like you display flowers in a vase. So you can merely treat your bunch of mints the same way you treat a bouquet.
What you need:
- A glass of water
- A scissor or a knife
Step-by-step instructions:
Step 1: Prune the end of the stem and remove the lower leaves to create more space for the stem to soak up water and avoid flooding the lower leaves, leading to the remaining leaves spoiling faster.
Step 2: Put the mints in the glass and fill water enough to cover the stem cut ends.
Step 3: Place it anywhere in your home as a decoration. But be careful with high-temperature places because it will destroy your leaves.
There’s no need to put in much effort in this way to preserve your mints. But remember to change the water when you see it gets cloudy to store the leaves for about a week.
Option 2: Store As Type Of Mint Sugar
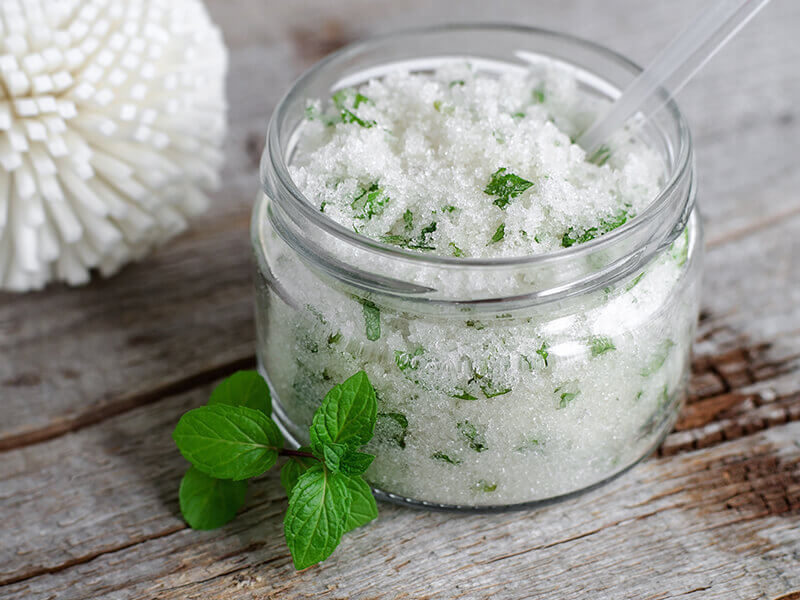
Making yourself a jar of mint sugar is very easy! Let’s try and explore what else you can do with the mint leaves other than the commonly applied uses.
What you need:
- Mint leaves
- Sugar
- A food processor
- A mortar and pestle
Step-by-step instructions:
Step 1: Choose fresh leaves from your bunch of mint leaves; the quantity depends on your preference.
Step 2: Puree the leaves by putting them in a food processor or pounding them with a mortar and pestle.
Step 3: Gradually add enough of your favorite type of sugar and grind or pound the mixture a few more times to blend the sugar with the mint leaves.
Step 4: Put the above mixture in a glass jar and cover with a lid; leave for 2 to 3 days for the essential oil from the mints to infuse the sugar.
Sounds super easy, right? After that, you just need to store it in a dry, cool place, and you can use it until one month later. Give it a try to eat with salad, stir it in a cup of tea, or even in chocolate milk! The taste won’t disappoint you.
Bonus tip: You can also make mint sugar with dried leaves. And if you are interested in how to dry the leaves, scroll down for more.
Option 3: Make Mint Infusion
As I experienced, there is one more way to infuse the mint leaves. Please yourself with a cup of mint tea or a glass of mint cocktail, your choice.
No.1 Way: Make a cup of mint tea
You may haven’t known, but mint tea is one of the most popular tea varieties. Many love drinking it on cold days. And now you can make it at home to save your mint for a longer time.
What your need:
- Fresh mint leaves
- A teapot
- Boiling water
- Sugar, honey, a slice of lemon (optional)
Step-by-step instructions:
Step 1: Crumple mint leaves by hand to release the essential oil.
Step 2: Put them in your teapot and pour boiling water.
Step 3: Add sugar or honey (skip this step if you want a pure mint tea).
Not only can you enjoy it right away if you want a pleasant warm cup of tea, but also you can leave it cool a little bit, then store it in the fridge, and taste it within 2 to 3 days.
Visualize steps to make your own mint tea, which will be much safer and healthier.
No.2 Way: Mint infusion

Do you love flavorful cocktails with vodka or rum? If yes, try infusing mint leaves with these two liquors!
What you need:
- Vodka or rum
- Mint leaves.
Step-by-step instructions:
Step 1: Crush the leaves by hand for essential oil release.
Step 2: Pour the amount of alcohol you need into a well-closed jar, and put them in.
Step 3: Keep it in a cool, dry place like you are storing a bottle of wine.
Check it daily until it achieves the effect you desire. With a mint-infused drum as part of a recipe, you can skip the shaking step when making a mojito as well.
It’s not necessary to infuse the whole bottle of vodka or rum; take the amount needed to serve the best quality for your alcohol.
Give yourself a glass of mojito with a recipe from mint leaves, and enjoy it.
Method 2: Store In The Fridge
So why store it in the fridge? Here are some reasons I believe are compelling enough for you to choose this method:
#1: The refrigerator usually goes with a suitable temperature and humidity.
#2: Refrigerate and preserve fresh fruits and vegetables for a long time and retain their nutritional value. Vegetables and fruits, after being refrigerated, their vitamin content, firmness, color, and weight are unchanged.
#3: Retains the original taste and quality of fruit and vegetables.
#4: Cold storage prolongs the shelf life of fresh fruits and vegetables many times compared to natural methods.
#5: Cold storage helps them to stay away from infected bacteria or harmful insects. Limit the level of damage during the long-term storage.
As for vegetables, you had better store mint in the refrigerator for better preservation to keep the freshness and the nutritional value that it brings.
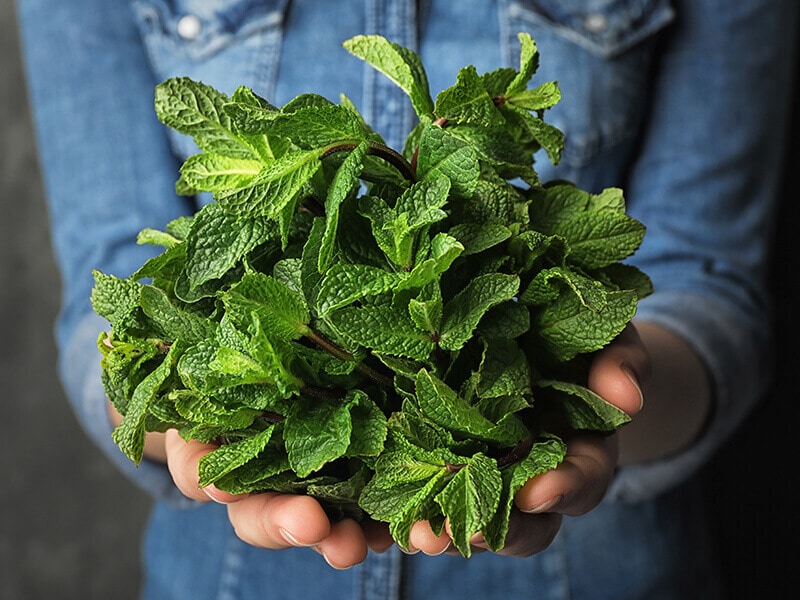
Option 1: Using A Jar Or A Glass Of Water
Store mint leaves in a glass of water; it sounds similar to the previous one, right? But with several easy steps added, you will receive better results, which means you can see the leaves stay fresh for 2 to 3 weeks. Let’s find out.
What you need:
- Scissor or knife
- Water
- A jar or a glass
- Plastic bags
Step-by-step procedure:
Step 1: Cut off damaged, waterlogged leaves
Step 2: Cut off the hard part under the stem diagonally and keep the fresh part; this allows the branch to absorb water more efficiently, keeping the fresh leaves for longer.
Step 3: Dip the plant in a jar or a glass of water filled with a bit of water, remembering only to cover part of the stem to avoid bruising the leaves.
Step 4: Protect the leaves by wrapping the plastic bag to cover the leaves, using elastic to tie the jar loosely; this helps regulate humidity so that the leaves are not crushed.
Step 5: Place the jar in an empty place in the fridge, making sure it’s wide enough so it won’t get crushed during storage
Bonus tips:
#1: With this method, it is unnecessary to wash the leaves first. Washing mint leaves before putting them in the fridge for storage will make excess moisture, quickly spoiling the leaves. If you want to wash them, make sure to dehydrate your mint leaves before putting them in the fridge.
#2: Because the leaves are pretty soft and bruise easily, so be gentle when keeping in touch with it.
#3: Remember to change the water regularly to maintain freshness and prevent bacteria growth. You can use distilled or mineral water for pristine preservation.
Option 2: Wrap Mint Leaves Using A Damp Paper Towel + A Plastic Bag
Replace a glass of water with a damp paper towel, with a bit of technique required, but you can store them for at least 2-3 weeks; why not?
What you need:
- Paper towels
- Water
- A plastic bag
Step-by-step instructions:
Step 1: Rinse the leaves with water to remove dirt.
Step 2: Pick the leaves off the stem; remember to be gentle to avoid damaging the leaves.
Step 3: Absorb excess water on the leaves with dry paper towels.
Step 4: Place the leaves gently on dampened paper towels, avoid overly wet towel papers because they can cause the leaves to rot promptly.
Step 5: Once spreading the leaves evenly, gently and slowly wrap each side of the paper towel to ensure all surfaces of all leaves are supplied with moisture and prevent air exposure.
Step 6: Put them in a plastic bag. Remember not to tie the plastic bag tightly so that the air can circulate.
Step 7: Place them in the refrigerator.
Bonus tip:
#1: Ensure to check it frequently and change other paper towels when needed. Besides, make sure of the right amount of humidity.
#2: Don’t seal the bag because it could lock in too much moisture, and you will waste your leaves unconsciously.
#3: If a plastic bag is not available in your home, you can wrap one more layer of dry paper towel and stick it in your fridge.
Option 3: Using A Wet Paper Towel + An Airtight Container
Take advantage of airtight containers to retain the mint freshness if you don’t want plastic bags to appear in your refrigerator. The airtight containers are more stable to store the leaves for about two weeks.
What you need:
- Paper towels
- Water
- Airtight containers
Step-by-step procedure:
Step 1: Rinse the leaves with water to remove dirt.
Step 2: Pick the leaves off the stem; remember to be gentle to avoid damaging the leaves.
Step 3: Absorb excess water on the leaves with dry paper towels.
Step 4: Wrap the leaves gently with damped paper towels; just like how you do it at the previous option.
Step 5: Arrange the leaf rolls into the plastic container. Don’t try to put too much in one box; leave space for the leaves to have enough moisture.
Step 6: Place them in the refrigerator.
Method 3: Freeze The Mints
One of the best techniques to preserve mint freshness and aroma is freezing. You can store them in the freezer for later use. Frozen mint will not only bring back the fresh mint flavor but also make for eye-catching drinks.
No need to wait any longer; I will provide three super easy ways to make those images more transparent. Feel free to choose any of the following options for your best comfort choice.
Option 1: Freeze In Ice Cubes
It does not take too much of your time to freeze mint in ice cubes, but you still can see how well it works with your mint.
It is worth adding the mint ice cubes to your drinks, sauces, or soups. The cold from the ice cubes and the freshness from the mint will bring you a new enjoyable experience.
What you need:
- A scissor or a knife
- Water
- Dry paper towels
- Ice tray
- Ziplock bags
- Space on the fridge freezer
Step-by-step instructions:
Step 1: Remove dead leaves and cut off the roots of the mint bunch.
Step 2: Gently rinse mint sprigs under clean water to remove dirt and other impurities.
Step 3: Absorb water by using dry paper towels.
Step 4: Separate the leaves from the stem.
Step 5: Chop the mint leaves using a sharp knife; try not to use a blunt one because it could bruise your leaves and somehow lose the flavor.
Step 6: Place them in each ice tray compartment and pure water, leaving a bit of space on top for water to solidify.
Step 7: Put the ice tray into the freezer for 2 to 3 hours.
Step 8: Pop the blocks out of the tray and transfer them to a ziplock bag once it is completely frozen.
Step 9: Put them back in the freezer for storage.
In this way, you don’t need to change the water as often as the previous methods above, and your mints will stay fresh for 3 months.
Create your own tropical mint leaves ice cubes to decorate your beverages. Watch this video:
Option 2: Freeze With Baking Sheet
Not sure about a way to preserve your mint leaves without breaking their shapes? Try this!
What you need:
- A scissor or a knife
- Water
- Dry paper towels
- Baking sheet
- Freezer bags or airtight containers
Step-by-step procedure:
Step 1: Take the leaves off the sprigs.
Step 2: Rinse the leaves with water and pat them dry with paper towels.
Step 3: Place leaves on a baking sheet.
Step 4: Put it in the freezer and freeze for 2-3 hours.
Step 5: Place them into trusted freezer-friendly containers or bags and store them in the freezer for up to 3 months.
Option 3: Freeze With A Vacuum Sealer
I could say a vacuum sealer is a perfect way to store fresh mint and keep the flavor-rich for up to 3 months.
What you need:
- A pot of boiling water
- Ice water
- Dry paper towel
- Vacuum sealer bags
Step-by-step instructions:
Step 1: Blanch the leaves in boiling water for a few seconds. When vacuuming herbs, this is the way to preserve their fresh flavor best.
Step 2: Take them out and drop them in ice water immediately.
Step 3: Pat the leaves dry (never vacuum the wet leaves, they will bruise easily).
Step 4: After the leaves have dried, gently place them in each bag, don’t put them all in one bag.
Step 5: Vacuum each bag carefully, make sure there is no oxygen left in the bag.
Step 6: Freeze them.
Bonus tips:
#1: If you continuously freeze them, they will last for about 6 months.
#2: To be extra careful, label and date each bag you put in the freezer. If so, you can distinguish and identify the correct herbs and the exact time you put them in.
#3: Quantify the servings you need and seal enough for particular dishes.
Method 4: Dry Your Mint
Are you doubtful about the above methods because you are not often at home and cannot guarantee to take care of the fresh mint?
Don’t worry! Take some of your spare time to dry the leaves, and you won’t have to put effort into the preservation process, but you can still enjoy the mint flavor.
Tools and materials needed:
- With the drying process, you need supplies such as a dehydrator, an oven, a microwave, or just naturally air-drying the leaves.
- Airtight containers
- A tray
To begin with, let’s take a look at the preparation steps:
Step 1: It’s crucial to wash mint leaves carefully underwater, to make sure they are free of dust, soil, critters, or germs.
Step 2: After washing them, pat them dry with paper towels to remove the excess water on the leaves. If you are uncertain whether it’s dry or not, err on the side of caution and pat them dry again.
Step 3: Check for any signs of moisture in the airtight containers because it can cause mold and destroy your dried mints.
Once the leaves are washed and dried, pick one of the options below to dry your mints.
Option 1: Natural Air-Drying
Air-drying is the easiest way, and you don’t need any help from equipment. All you need is a stray or a string.
Here I have two ways with this method:
No.1 Way: Spread the leaves evenly on the tray
Step-by-step instructions:
Step 1: Place the paper towel or kitchen towel on the tray.
Step 2: Place the leaves on the tray with a single layer to ensure air circulation and quick drying.
Step 3: Cover the leaves with a paper bag as a ventilated protective covering in order not to be impacted by any dust or critters
Step 4: Place the tray in a cool, dry spot, away from direct sunlight.
Bonus tips:
#1: Every few days, turn the leaves gently to ensure even drying.
#2: Depending on the weather and humidity level you live in, it takes about a week to dry entirely.
To visualize preparation steps and how dried mint leaves are made, refer this video:
No.2 Way: Hang a bunch of leaves in a well-ventilated place
Step-by-step instructions:
Step 1: Tie into small bunches with string and hang upside down in a cool place, out of sunlight, because it can make the leaves turn brown and break down the essential oil.
Step 2: Tie a paper bag loosely so that the leaves do not fall off.
Step 3: It takes 2 weeks to dry, but if the leaves are not completely dry after 2 weeks, it could be because the air is too humid, and you should get to know the other drying methods below.
Option 2: Dry With A Dehydrator
Drying mint with an efficient dehydrator specialized for food could save much of your time. If you don’t want to glance at the leaves to check them daily, this one’s for you.
Step-by-step instructions:
Step 1: Place the leaves evenly on a single tray across your dehydrator, leaving a little space in between each leaf for air circulation.
Step 2: Dry them with a temperature of 95ºF to 115ºF (35ºC to 46ºC); a typical time is about 2-4 hours.
Step 3: Remember to check them after 2 hours of drying, then every 20-30 minutes.
Step 4: When you see the leaves are crispy, it means you have succeeded.
Step 5: Before storing them in a jar, let them cool completely .
Store dried mints in a cool, dry location and use them within 6 months to one year for the best flavor.
Check out the steps to dry fresh mint with a dehydrator:
Option 3: Oven-Drying Mint Leaves
If there is an oven available in your home, follow the steps below to save even more of your time:
Step 1: Preheat the oven with low heat (about 60ºC/140ºF).
Step 2: Arrange the leaves in one layer only, not let them overlap with each other.
Step 3: Put the leaves in the oven for 2-4 hours, slightly leave the oven door open to release the steam; this is also a way to dry the leaves faster.
Step 4: When the leaves are crisp, let cool entirely and crush the leaves by hand.
Step 5: Put the dried leaves in an airtight container and avoid direct sunlight.
Option 4: Microwave-Drying
For the long-lasting, intense flavor of mint, the microwave is also a good choice. Just conduct as the following steps:
Step 1: Spread the leaves evenly on a baking tray or plate lined with foil, and use a thin layer of paper to cover the tray.
Step 2: Place them in the microwave with high heat for about 2 to 3 minutes. When taking it out, if it’s not crispy enough, put it back in the microwave for another 30 seconds.
Step 3: Let the leaves cool completely, then crush the leaves by hand.
Step 4: Put the finished product into an airtight container and store it in a cool, dry place, out of sunlight to keep its flavor.
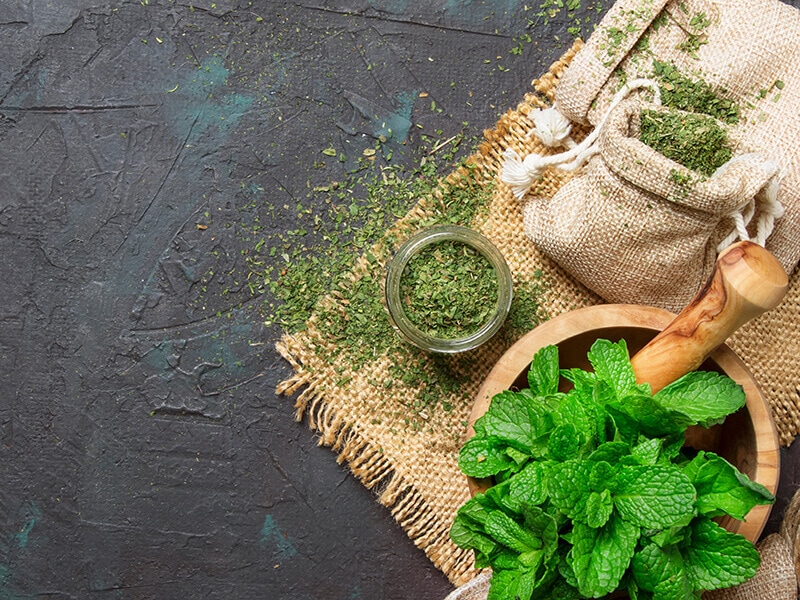
Bonus tip: Note that just put the leaves in the microwave when they are thoroughly dried; otherwise, the leaves may be steamed or “cooked” instead of drying.
Take a little of your time to visualize the steps to dehydrate the mints by microwave. Watch the video:
How Do You Know Your Leaves Are Going Bad?
Mint is one of the easiest plants to grow, but it is perishable and can quickly go bad if not stored appropriately. It is a short shelf life plant, so be careful to check for some physical changes that appear on the leaves when you buy or before using them.
Consuming spoiled mint leaves can affect your health. Therefore, check the leaves when they have signs of spoiling by looking, smelling, or touching them.
- Check for brown spots: When brown spots exist, it means mold has attacked the leaves, so try to find another bunch.
- Smell mint leaves: Mint is usually aromatic and gives the feeling of freshness. If it smells strange, choose another bunch of mints, or you will waste the leaves.
- Touching the leaves: Mints have a smooth texture; if you feel the soft and mushy, they are already showing signs of going bad.
When your mint bunch shows one of the signs of damage above, remove those leaves to get rid of bacteria from them getting to other leaves.
4 Obvious Signs Choose The Freshest Mint
You should not ignore that if you want to keep your mint leaves fresh for longer; then when buying, you should choose the fresh mint leaves as much as possible.
Here are some signs showing that you are choosing the best mint leaves:
- The leaves are bright green and do not turn in yellow
- The leaves have a pungent smell
- The trunk is not waterlogged or turns black
- Buy just enough for your intended use in a certain time
When you use the leaves less than expected, and there are still leaves left over, treat them according to the steps above to avoid leaf waste.
FAQs:
After reading my post, I’m pretty sure the general information about storing your fresh mint still cannot meet all of your needs. I will give you some more frequently asked questions which are to demonstrate your query better. I hope these answers will be helpful for you.
Which Way Is Best To Store Fresh Mint?
I’ve put together some ways to use mint leaves, their benefits, ways to store fresh mint, and a few ways to choose fresh mint leaves and recognize the signs when mint leaves are starting to spoil. I hope the information is useful to you.
I am sure you have already collected some useful information after reading my post. You may not be satisfied from the first try, but try one by one to determine which one works best for your purpose. I’m excited to hear about your experience with the tips mentioned earlier.
If you have any other tips, don’t hesitate to share them in the comment section below. And if you find this post helpful for people around you or anyone who needs it, share it with them.
Reference
- En.wikipedia.org. 2021. Mentha – Wikipedia.

