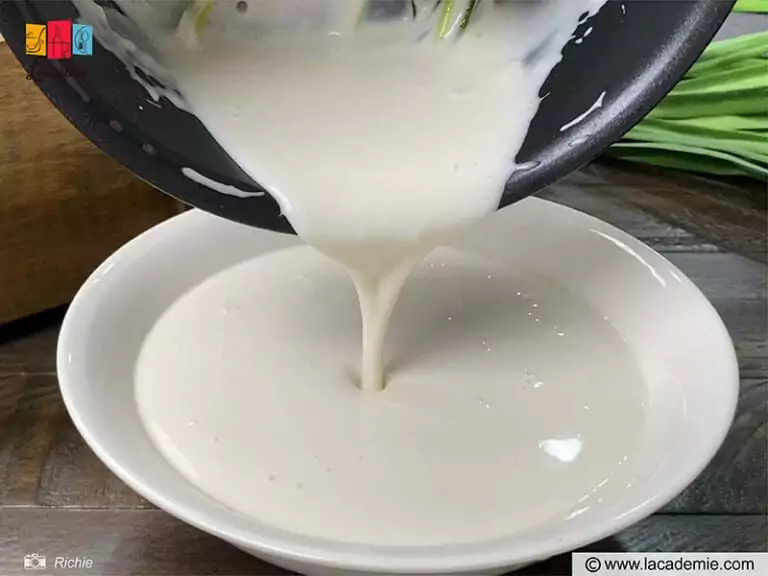
When it comes to tasty rice flour recipes, there are just too many to count. This magical ingredient fits exceptionally well in both sweet and savory dishes. Plus, rice flour is 100% gluten-free, meaning that everyone can enjoy it without any worry.
The real question here is, which recipe should you try first? I mean, picking one out of hundreds of rice flour recipes isn’t really a simple task. Well, worry not because I’m here to help you with that.
In today’s post, let’s take a look at 10 mouth-wateringly delicious rice flour recipes that you can make right at home!
What Is Rice Flour?
Rice flour is a form of smooth and fine flour made from ground rice. It comes in two main varieties: white rice flour made by milling non-sticky white rice, and brown rice flour that is the result of grinding whole-grain rice brown. (1)
Rice flour contains no gluten and typically has a mild flavor profile, though the brown rice variety is a bit earthy in taste. It is commonly used in baking and frying recipes or as a thickening agent for soups, gravies, and stews.
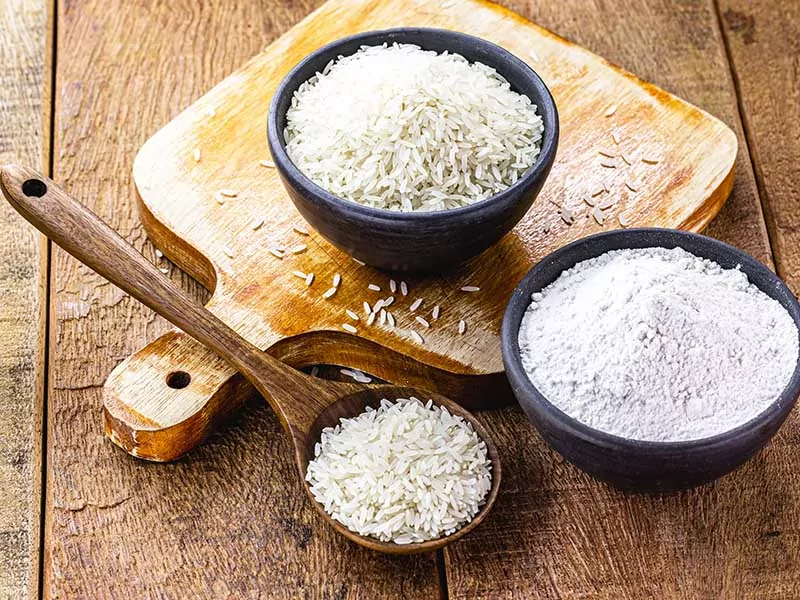
Thanks to its gluten-free nature, rice flour is an extremely popular ingredient in zero-wheat cooking.
However, it’s not the only choice for gluten-sensitive people. Some excellent replacements for rice flour include high-grade almond flour, oat flour, and tapioca flour. Most of these substitutes will yield relatively similar results, albeit with minor changes in taste and texture.
In addition to regular rice flour, there’s also glutinous (or sweet) rice flour. Though they might look somewhat similar, there are many differences between rice flour and glutinous rice flour. For example, sweet rice flour is made from sticky rice instead of non-glutinous rice.
Moreover, while rice flour can be seen in both sweet and savory recipes, its glutinous cousin is primarily associated with dessert dishes.
7 Must-Try White And Brown Rice Flour Recipes
If you’re still unsure what to cook with your rice flour, here are some delicious recipes for you to choose from. I’ve included both dessert and main dish recipes in this list to help you understand the versatility of this magical ingredient!
1. Traditional Shortbread
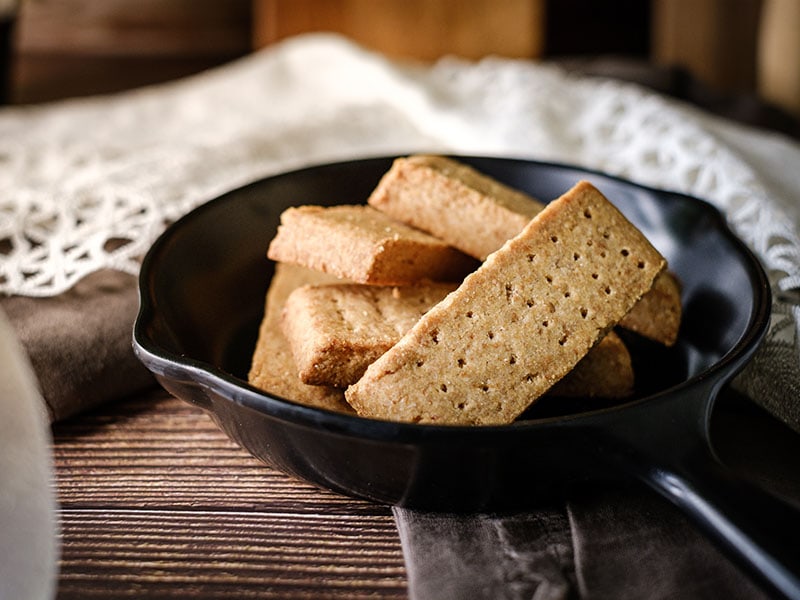
Shortbread is a tasty Scottish dish that you can make with only 4 ingredients. It’s an excellent choice for your Christmas dinner, New Year’s Eve, or any occasion when you’re cooking for a crowd.
Necessary Ingredients
As mentioned above, this recipe is incredibly simple to make and only requires 4 ingredients.
- Butter (softened): 300g
- Golden caster sugar: 140g and 4 tablespoons
- Plain flour: 300g
- Rice flour: 140g
- Salt
How To Make Shortbread
Now that you’ve gathered all the ingredients, let’s start making some shortbread biscuits!
Step 1: Make The Flour Mixture
Put 140g of sugar and 300g of butter in a food processor (or a best-matched alternative for food processors if you don’t have one) and whizz until they become a smooth mixture. Next, pour in the flours and a pinch of salt, then blend everything thoroughly.
Step 2: Refrigerate The Flour Mixture
Spread the flour mixture on a baking tray then cover it with plastic wrap. Smooth over the mixture to remove the wrinkles. Refrigerate for at least 30 minutes. You can keep it in the refrigerator for up to 2 days.
Step 3: Prepare The Oven
Heat the oven to 350°F (160°C fan or gas mark 4).
Step 4: Bake The Shortbread
Take your flour mixture out of the fridge and remove the plastic wrap. Poke it lightly with a fork then sprinkle 4 tablespoons of sugar on top. Next, bake the dough for 20 to 25 minutes.
Step 5: Cut And Serve
Let the shortbread cool in the tray, then cut it into small slices. You can store your shortbread in an air sealed container for up to a week.
How to make Scottish shortbread cookies using only 4 ingredients.
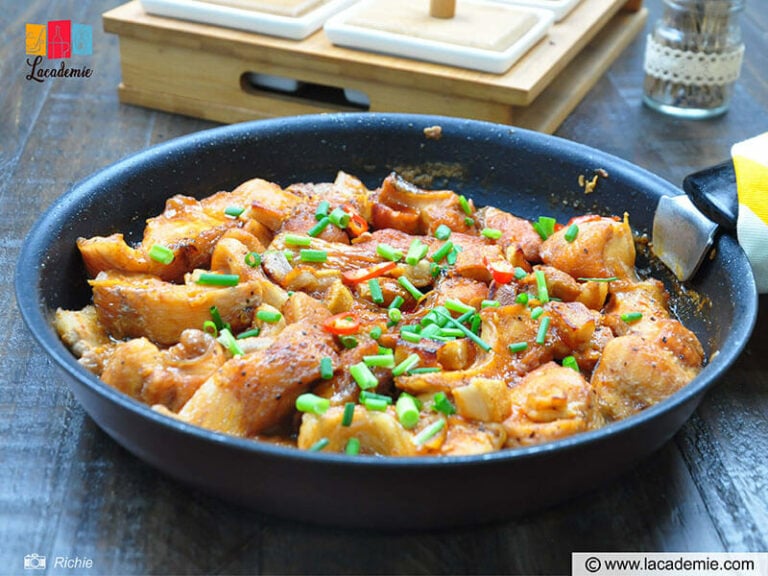
2. Sweet & Sour Pork Stir Fry
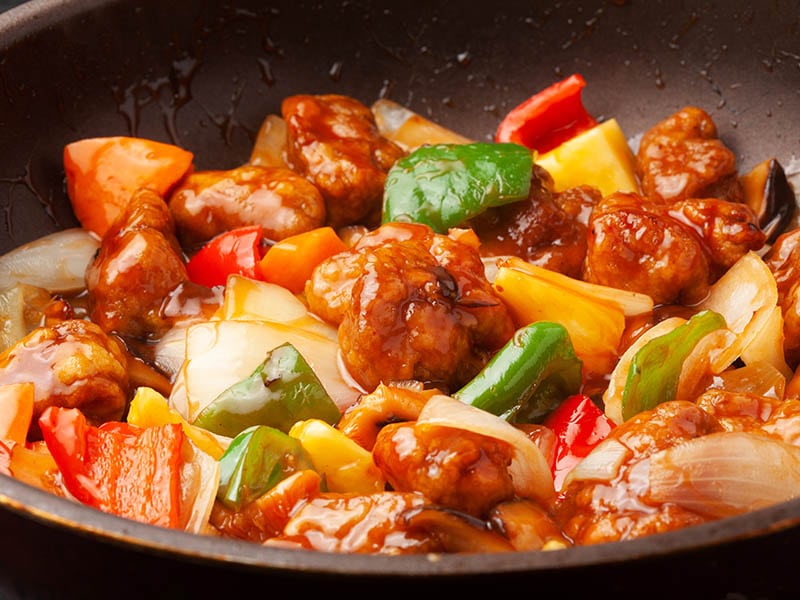
Apart from sweet baked goods, rice flour can also be used to make savory stir-fried dishes. This is the perfect dish to make for Monday dinners, as it’s incredibly quick and easy to prepare. Not to mention that this goes perfectly well with hot rice – something that requires little effort to cook.
Necessary Ingredients
To create the pork’s unique sweet and sour flavor, we’ll be using a combination of soy sauce, ketchup, and spices. Vegetables like bell pepper and onion will help balance out the meat and give the dish a vivid appearance.
For The Pork:
- Boneless pork loin (or diced boneless pork shoulder, depending on what you like most among the disparities between pork loin and pork shoulder): 1 ½ pounds
- Kosher salt: 1 teaspoon
- Rice flour: ¼ cup
- Olive oil: ¼ cup
- Bell pepper: 1
- Red onion: 1
- Tomatoes: 2
- Garlic: 3 cloves
- Pineapple (diced, optional): This is not a must, but if you like some extra tang and sweetness in your pork, feel free to add some.
For The Sauce:
- Packed brown sugar (ideally dark brown sugar): ⅓ cup
- Rice wine vinegar: ¼ cup
- Ketchup: 3 tablespoons
- Soy sauce (or tamari sauce for gluten-free diet): 2 tablespoons
- Green onions for garnishing (optional)
- White rice for serving (optional)
How To Make Sweet & Sour Pork Stir-Fry
For stir-fry dishes, things will be moving a bit fast, so make sure that you’ve read through all the steps in advance.
Step 1: Season The Pork
Put the pork in a medium-sized bowl, season it evenly with kosher salt then sprinkle rice flour on top. Toss the pork around to coat it in the flour. Put aside.
Step 2: Make The Sauce
To make the sauce, whisk the brown sugar, ketchup, rice wine vinegar, and soy sauce well in a bowl. When done, you can either set the sauce aside or refrigerate it in an air sealed container for up to a week.
Step 3: Prepare The Vegetables
Deseed and dice the bell pepper, red onion, and tomatoes into ½-inch cubes. Chop and grate 3 cloves of garlic.
Step 4: Cook The Vegetables
Place a large skillet over medium-high heat and add 1 tablespoon of olive oil. When the oil is heated and simmering, add the vegetables and garlic. Stir continuously for about 1 minute until they’re barely softened, then transfer to a bowl and put aside.
Step 5: Cook The Pork
Pour the remaining oil into the skillet on medium-high heat. Wait for the oil to heat. Once shimmering, add the pork. Remember to shake off the excess rice flour beforehand. Cook the pork for about 90 seconds on each side until they turn deep brown.
Step 6: Stir-Fry The Pork With The Sauce
Add the sweet and sour sauce into the skillet and bring the heat up to high. Stir constantly for 2-3 minutes until the sauce thickens a little. Add the vegetables and stir to coat every ingredient with the sauce. Cook until warm.
Step 7: Serve Over White Rice
Serve immediately with white rice. You can also slice some green onions and use them as garnish.
3. Rice Flour Blueberry Muffin
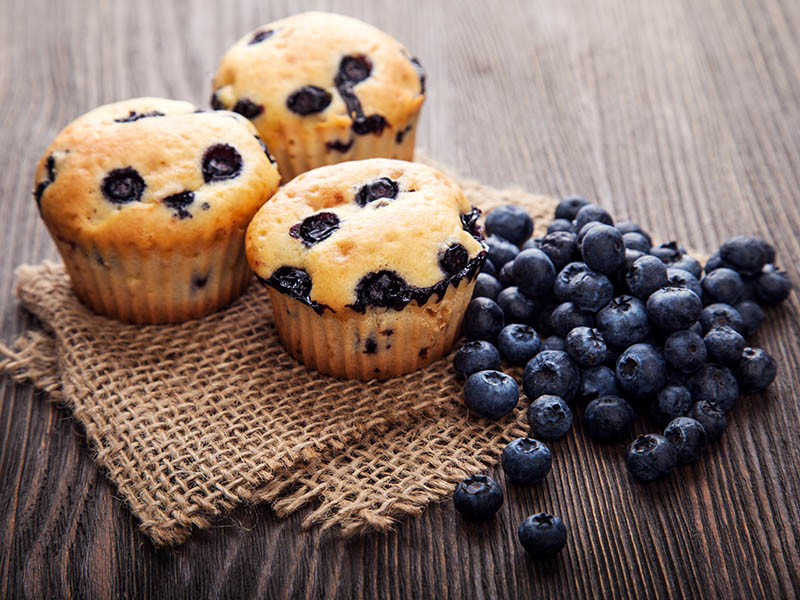
Blueberry muffin is one of the classic breakfast dishes that everyone loves. While plain flour or pastry flour is often used to make muffins, you can swap them for rice flour if you’re sensitive to gluten. These decadent blueberry treats will come out just as light and fluffy!
Necessary Ingredients
This amount of ingredients will allow you to make 6 rice flour blueberry muffins.
- Sugar: 4 tablespoons
- White rice flour: 1 cup and 1 ½ teaspoons
- Canola oil: 2 tablespoons and 1 teaspoon
- Egg: 1
- Milk: ½ cup
- Baking powder: 2 teaspoons
- Salt: ½ teaspoon
- Grated lemon or lime zest: ½ teaspoon
- Fresh blueberries: ½ cup
How To Make Rice Flour Blueberry Muffin
The streusel topping will need to be prepared separately from the muffins dough. This recipe will take you about 35 minutes in total.
Step 1: Prepare The Oven And The Muffin Tray
First, preheat your oven to 425°F and lightly grease the muffin tray.
Step 2: Make The Streusel Topping
Add 2 tablespoons of sugar, 1 and a half teaspoons of white rice flour, and 1 teaspoon of canola oil to a bowl and mix to combine. Stop when the mixture reaches a sandy texture. Set aside.
Step 3: Prepare The Dry Ingredients
Mix the remaining white rice flour and sugar well with baking powder, lemon (or lime zest) and salt. Add the blueberries and stir carefully.
Step 4: Mix The Dry Ingredients With Wet Ones
In another bowl, blend the egg, milk, and 2 tablespoons of canola oil well then add the dry ingredients. Mix everything together until combined.
Step 5: Bake Your Muffins
Fill ⅔ of each muffin cup with the dough mixture and sprinkle streusel on top. Bake your muffins for 15 to 20 minutes until they are slightly brown on the edges. When done baking, let them rest in the tray for 5 minutes before taking out.
In a hurry? Check out this 43 seconds guide to making blueberry muffins.
Notes
If you want the crumb to be a little softer and airier, you can add about ¼ cup of cornstarch, potato starch, or arrowroot. A small amount of xanthan gum (about ¼ teaspoon) can also improve your muffins’ texture and help them stay fresh for longer.
Some people also replace regular eggs with chia eggs, but personally, I’m not a fan of doing so.
4. Beer-Battered Fish And Chips (Fish Fry)

You can use rice flour to make the signature fish batter from Long John Silver restaurant. It’ll be a nice component to your fish and chips, also known as deep-fried fish and French fries.
They are a divine food combo that everyone should try at least once. Crispy from the first bite to the last, this dish is the perfect side dish to snack on while enjoying a glass of beer.
Necessary Ingredients
For a dish tasting this delicious, beer-batter fish fry requires surprisingly simple ingredients.
- Self-rising flour: 1 cup. You can make self-rising flour by mixing 1 cup of all-purpose flour with ½ teaspoon of fine salt and 1 teaspoon of baking powder.
- Rice flour: 4 tablespoons. If you don’t have rice flour, potato starch or cornstarch will do.
- Baking powder: ¼ teaspoon
- Cod filets: 6 ounce (4 slices)
- Ice cold Lager beer: 1 cup. Other types of beer also work, just stay away from dark and intense-flavored ones like porter or stoutes as they’ll affect the batter’s color and taste.
- Salt
- Vegetable oil
How To Make Beer-Battered Fish And Chips
Without further ado, let’s get cooking. If you’re using frozen fish filets, remember to thaw them ahead of time.
Step 1: Make The Batter
Pour 1 cup of self-rising flour, 2 tablespoons of rice flour and ¼ teaspoons of baking powder into a bowl and whisk well. After whisking, keep the batter mixture in the freezer until ready to mix with beer.
Step 2: Prepare The Fish Filets
Pat the fish filets as dry as you can. Cut them lengthwise into 1-inch thick slices. Pour the remaining rice flour on a dish and season it with salt. Dust your filet with the flour-salt mixture and shake off the excess. Put the fish on top of a dish covered with wrinkled foil.
Step 3: Prepare The Deep-Fryer
Heat vegetable oil to 375°F in a deep-fryer.
Step 4: Finish The Batter
Take the flour mixture out of the freezer and add beer to it. Whisk the batter until it reaches a thick consistency, like pancake batter. Coat the fish filets by dipping them into the batter then lift out and wait for excess to drip off.
Step 5: Fry Your Fish
Fry the fish pieces for 3 to 4 minutes, dipping them in oil occasionally. When they’ve turned golden brown, take the fish out and drain them on paper towels. Serve hot with salt and vinegar french fries, lemon, and tartar sauce.
Notes
While you can almost any kind of beer for the batter, you need to make sure that the beer is ice cold by cooling them for 2 hours or more in the fridge. Remember, cold beer makes for extra crispy batter.
Preparing your batter in advance is a great idea if you don’t have a lot of time to cook, just make sure to refrigerate it at all times. While frying a large batch, you can also place the batter on top of an ice bowl to keep them cold.
You don’t have to follow the seasoning in this recipe to the letter. Feel free to flavor the fish with whatever you want before coating them with batter. Just be mindful not to go too heavy on the salt as salt is very absorbent and can dry out the inside of fish.
Speaking of dry, remember to pat the fish as dry as possible before it goes to the cold batter.
5. Wheat-Free Banana Bread
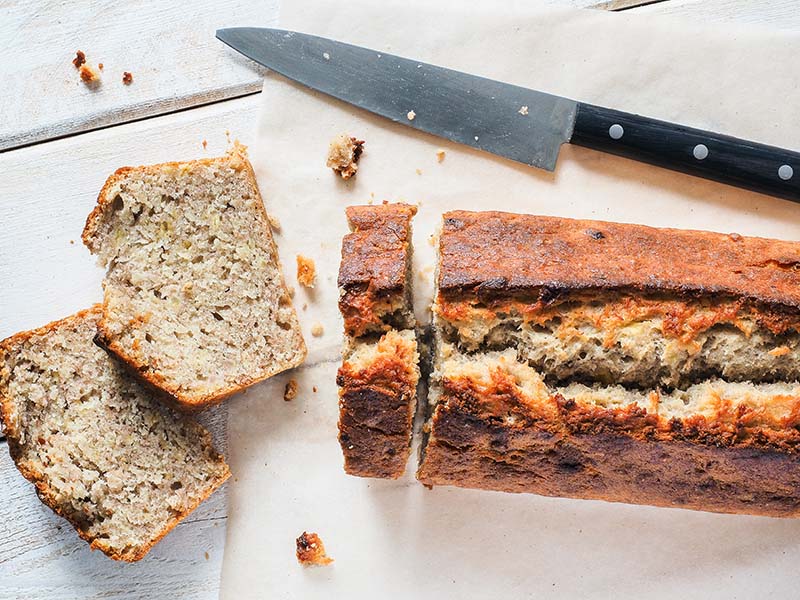
If you’re a fan of scrumptious desserts with bananas like I am, this recipe is a must-try. Fluffy and soft with just the right amount of sweetness plus the addicting flavors of coconut and banana, you won’t be able to stop eating this tasty banana bread.
Necessary Ingredients
This recipe calls for 2 cups of brown rice flour. If you don’t have them, you can use 2 cups of white rice flour or another suitable brown rice flour alternative, (such as almond flour and amaranth flour) instead. Either way, your bread will turn out just as delicious as store-bought.
- Softened butter: ⅓ cup
- Sugar: ⅔ cup
- Eggs: 2
- Buttermilk: 3 tablespoons
- Lemon extract: 1 teaspoon
- Brown rice flour: 2 cups
- Baking powder: 1 teaspoon
- Baking soda: ½ teaspoon
- Salt: ½ teaspoon
- Mashed ripe banana: 1 cup
- Toasted coconut: 1 cup
How To Make Wheat-Free Banana Bread
Making banana bread will take about 1 hour and 15 minutes. For some people, this may seem like a long time to cook something but trust me; you won’t regret it.
Step 1: Preheat The Oven.
Preheat your oven to 350°F.
Step 2: Make The Butter Mixture
Add butter and sugar to a large bowl and beat until creamy. Next, add one egg at a time and beat well. Pour buttermilk and lemon extract into the butter mixture and mix well to combine.
Step 3: Finish The Bread Dough
Combine rice flour with baking powder, baking soda, and salt. Then, add it to the above mixture. To complete the bread dough, stir in the mashed bananas and toasted coconut. Mix well.
Step 4: Bake Your Banana Bread
Grease 2 mini loaf pans and spoon in the bread dough. Bake for 50-55 minutes.One tip to know when to stop baking is to insert a wooden pick into the center of the bread. When the pick is pushed out, your bread is fully baked.
6. Murukku (Indian Crunchy Rice Snack)
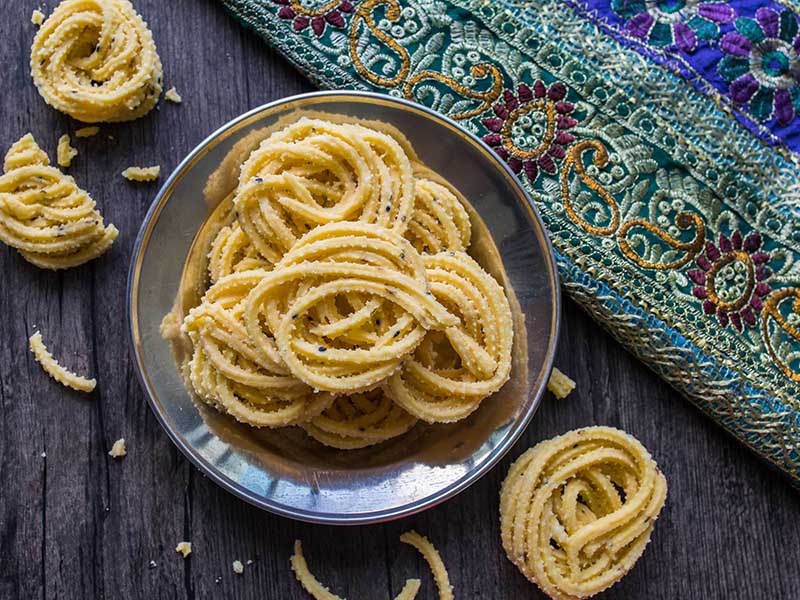
Murukku is a South Indian deep-fried snack made with dal flour, rice flour, and a mix of spices. Traditionally, these crunchy and flavorful treats are prepared during festivals like Sankranti, Dasara, and Diwai. They make for fantastic snacks for your picnic or road trips.
Necessary Ingredients
Urad dal flour is one of the core ingredients of murukku. However, you can also use pottukadalai flour (roasted gram flour) instead.
- Rice flour (ideally high-quality rice flour or idiyappam rice flour): 1 cup
- Urad dal flour: 4 tablespoons or 3 tablespoons of pottukadalai flour (roasted gram flour)
- Hot oil: 1 tablespoon
- Sesame seeds: ¾ teaspoon
- Carom seeds: ¾ teaspoon. You can also ajwain, vaamu, or omam instead.
- Salt: ½ teaspoon
- Red chili powder: ½ teaspoon
- Asafoetida (optional): ⅛ teaspoon. You can also use hing.
- Oil: 2.5 to 3 cups (for deep frying)
How To Make Murukku
If you don’t have urad dal flour at hand, you’ll need to prepare it first. Don’t worry, making urad dal flour is very straight-forward and won’t take long.
Step 1: Make Urad Dal Flour
Dry roast 4 tablespoons of urad dal over medium heat until they’re aromatic and light golden brown (remember to stir frequently). Remove from heat and let the dal cool. Next, pour the roasted urad dal to a blender/grinder then grind until they turn into fine flour.
Learn how to make urad dal flour in just 1 minute.
Step 2: Make The Murukku Dough
In a bowl, combine the urad dal flour, rice flour, salt, ajwain, and sesame seed. Heat 1 tablespoon of oil and add to the mixture, mix well. Gradually add water and mix the flour to make the dough. Do not knead, you want the dough to be non-sticky with no crumbs.
Use the dough immediately after making. Otherwise, your murukku will absorb too much oil.
Step 3: Prepare The Murukku
Lightly grease the murukku mold and the star-shaped plate. Add oil into a kadai and heat it on medium heat. Fill ¾ of the mold with dough. Press the mold to release the dough and make spiral-shaped murukku on aluminum foil, parchment paper, or muslin cloth.
Step 4: Check The Oil
Increase the heat to medium-high. Drop some dough into the oil to check whether it has become hot enough. If the oil has reached the right temperature, the dough will rise steadily instead of sinking and won’t turn brown.
Step 5: Fry The Murukku
Transfer the murukku to a spatula or ladle and place it in the oil. Your murukku will slide off the spatula automatically. Alternatively, you can simply gently drop each murukku into the oil. Fry on medium-high heat until they turn golden brown and crunchy. Stir frequently.
Step 6: Let Cool And Enjoy
Drain your murukku on paper towels and let them cool completely before enjoying. You can store murukku in an airtight jar for up to 1 month.
7. Banh Xeo (Vietnamese Crepes)

Banh xeo (Vietnamese crepes) is an essential street snack in Vietnam. The crispy batter is fried to a golden yellow then filled with shrimp, pork, bean sprouts, and shallots. To enjoy the dish to the fullest, remember to roll it in vegetables and serve with fish sauce.
Outside Vietnam, banh xeo is also popular as street food in Cambodia. In this neighboring country, the locals call it banh chao.
Necessary Ingredients
Rice flour, all-purpose flour and coconut cream are the secrets to delicious, crispy banh xeo’s batter. If you’re sensitive to gluten, you can swap out the all-purpose flour and use more rice flour instead. However, the crepes won’t be as crispy.
For making the banh xeo:
- Rice flour: 1 ¾ cup
- All-purpose flour: 0.7 cup
- Turmeric: 2-3 teaspoon
- Water: 28 fluid ounce
- Coconut cream or coconut milk: 14 fluid ounce
- Salt: 1 teaspoon
- Spring green onion (chopped about ½ inch long): 1
- Shrimp (remove head): 1 pound
- Pork belly: 1.5 pounds
- Medium yellow onion (sliced thin): 1
- Bean sprouts: 1.5 pounds
- Dried mung beans: ½ cup
For serving with the banh xeo:
- Head mustard greens: 1
- Mint: 1 bunch
- Cilantro: 1 bunch
- Vietnamese perilla: 1 bunch
For making the dipping sauce:
- Water: 6 tablespoons
- Sugar: 2 tablespoons
- Lime or lemon juice: 1.5 tablespoons
- Fish sauce: 2 tablesauce
- Garlic (minced): 1 clove
- Thai chili (sliced thin): 1
How To Make Banh Xeo
Are you ready to make some mouth-watering Vietnamese crepes? Let’s get started!
Step 1: Make The Dipping Sauce
In a bowl, mix the sugar and water well. You can heat about ⅓ of the water to help the sugar dissolve better. Add lime or lemon juice to taste. Lastly, add fish sauce to your liking and top it with chili and garlic. Mix well.
Step 2: Make The Batter
Combine the rice flour, all-purpose flour, turmeric, coconut cream and salt in a large bowl. Let the batter rest for 3 hours and up to overnight.
Step 3: Make The Fillings
Soften the mung beans by steaming or soaking them in water. Boil and slice the pork thinly. Wash other vegetables and the bean sprouts.
Step 4: Saute the Fillings
Add 1-2 teaspoons and some slices of onions into a frying pan over medium-high heat. Next, add some pieces of pork and shrimp then saute them until they turn slightly brown and aromatic. Remember to mix them lightly.
Step 5: Add The Batter
Pour a thin layer of batter into the pan. Tilt and rotate the pan to evenly distribute the batter. If you accidentally added too much batter, you can thin it out with a few tablespoons of water.
Step 6: Cook The Batter With The Lid Closed
Reduce heat to medium then throw in some bean sprouts, mung beans and cover the lid. Cook for about 3 minutes.
Step 7: Remove The Lid And Cook Until Crisp
Remove the lid and lower the flame to medium-low. Cook for another 5 to 7 minutes or until the crepe becomes crisp. After that, fold the crepe in half and transfer to a plate. Serve while hot with vegetables and dipping sauce.
Here’s a just-as-tasty vegetarian banh xeo recipe for my vegan readers.
Notes
To make vegetarian banh xeo, replace the shrimps with shredded fried tofu and swap out the fish sauce for soy sauce. As for the pork, change it for an array of your favorite mushrooms which also provides an umami, meaty flavor.
For egg-filled banh xeo, whisk 4-5 eggs and pour a thin layer over each crepe after the batter hits the skillet. Next, close the lid to let the egg cook for about 1 minute, then continue on with the fillings as instructed.
3 Sweet Rice Flour Recipes To Level Up Your Desserts
Sweet rice flour is the heart and soul of many yummy desserts. If you’re tired of the same old desserts, don’t hesitate to try out these sweet rice flour recipes!
8. Ice Cream Mochi
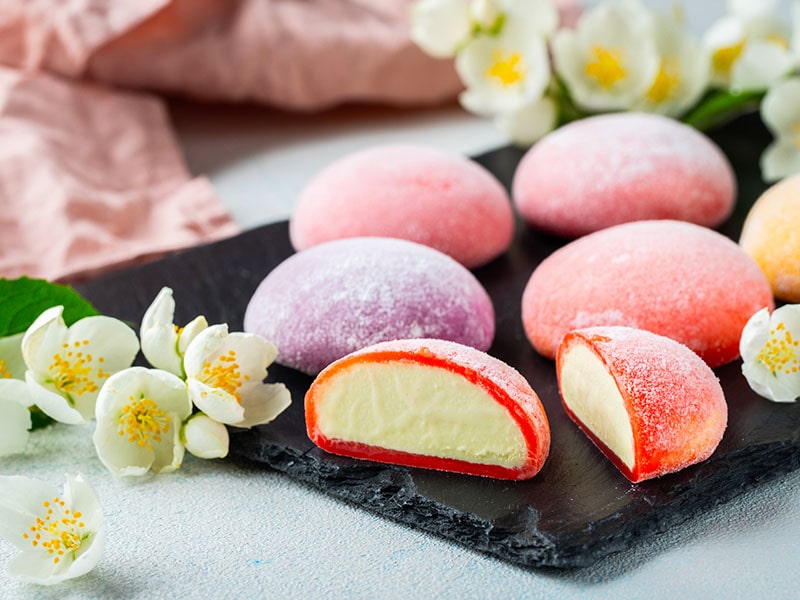
Mochi is a sweet rice-based Japanese dessert with a long history. While mochi is quite a treat itself, ice cream mochi is just on another level of tastiness. Cool and refreshing ice cream wrapped in a layer of slightly sweet and sticky mochi; what else to ask for?
Necessary Ingredients
You can make 12 ice cream mochi servings with this amount of ingredients. Any kind of ice cream can be used in this recipe so feel free to pick your favorite ice cream flavor!
- Ice cream: 1 ½ cups
- Sweet rice flour (mochiko): 1 cup
- Granulated sugar: ¼ cup
- Water: 1 cup
- Red food coloring (optional): a few drops
- Cornstarch or potato starch
How To Make Mochi Ice Cream
Although mochi ice cream might look complicated to make, the process is actually simpler than you think. Just follow these instructions closely, and everything will be a breeze.
Step 1: Make Small Scoops Of Ice Cream
Scoop out 12 balls of ice cream and place them on a tray lined with parchment paper. Each scoop should be about 2 tablespoons in size.
Step 2: Microwave The Flour Mixture The First Time
Combine sweet rice flour, water, and sugar in a large microwaveable bowl then cover it with plastic wrap. Microwave for 1 minute.
Step 3: Microwave The Second Time
Take the mixture out and use a whisk to stir it to remove any lumps. Cover with plastic wrap and microwave for another minute.
Step 4: Finish The Dough
Stir the mixture once again with a rubber spatula dipped in water then re-cover and microwave for 30 seconds. Your dough is now ready to be shaped into mochi balls. To make the mochi more appetizing, add a few drops of food coloring and stir evenly.
Step 5: Dust The Parchment Paper With Cornstarch
Line a large parchment paper on the counter and dust it generously with cornstarch or potato starch.
Step 6: Roll The Dough Out
Transfer the dough onto the dusted parchment paper using a wet spatula. Dust the dough with cornstarch and roll it into a rectangle with a thickness of more than ¼ inch. While rolling, keep adding cornstarch to prevent it from sticking.
Step 7: Refrigerate The Dough
When you’ve finished rolling the dough out, pick up the parchment paper and put it on a baking sheet. Refrigerate for 30 minutes.
Step 8: Cut The Mochi Dough
Take the mochi dough out of the refrigerator and start cutting it into circles using a 3 ¾ inch cutter.
Step 9: Shape The Mochi Ice Cream
Pick up a dough circle then brush off the excess cornstarch, remember to do both sides. Keep the flat side facing upward. Put one ice cream scoop in the center of the circle then fold over the mochi and squeeze lightly to seal.
Step 10: Wrap The Ice Cream Mochi In Plastic Wrap
Wrap your mochi one at a time with plastic wrap then put them into the freezer for 2 hours. And that’s it, you have successfully made ice cream mochi. Remember to let them sit for a couple of minutes at room temp before serving.
A simple step-by-step guide to making mochi ice cream.
9. Pumpkin Bread
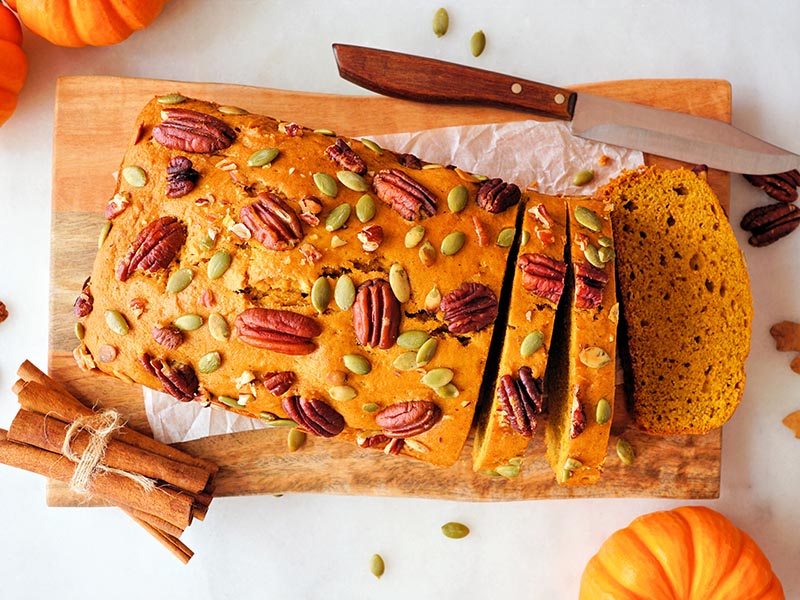
This pumpkin bread is moist with a slight chew coming from the glutinous rice flour. It has an addicting nutty-sweet flavor and will surely become the family’s new favorite dessert/ breakfast.
Necessary Ingredients
This recipe includes no wheat or any ingredient that contains gluten, so you can safely serve it to anyone.
- Pumpkin puree: 400 grams
- Caster sugar: 270 grams and 1 tablespoon
- Medium-sized eggs: 3
- Unsalted butter: 160 grams
- Sweet rice flour: 125 grams
- Sorghum flour: 110 grams
- Millet flour: 100 grams
- Potato starch: 65 grams
- Baking powder: 3 teaspoons
- Bicarbonate of soda: 1 teaspoon
- Ground cinnamon: 1 teaspoon
- Ground nutmeg: ¼ teaspoon
- Ground ginger: ¼ teaspoon
- Ground allspice: ¼ teaspoon
- Salt: ½ teaspoon
- Pumpkin seeds: 30 grams
- Water: 1 tablespoon
- Cinnamon: 1 pinch
How To Make Pumpkin Bread
With all the ingredients at hand, there’s nothing left to do but start baking your tasty pumpkin bread.
Step 1: Preheat The Oven
Preheat your oven to 350°F (160°C fan or gas mark 4). After that, line and grease a 9 inch bread pan.
Step 2: Melt The Butter
Put your butter on a saucepan and melt over medium heat. Wait for the butter to start crackling and sizzling. At this time, little brown bits will form at the bottom of the pan. As soon as the butter emits a toasty smell and turns to a darker color, remove it from the heat.
Step 3: Make The Pumpkin Mixture
In a bowl or a food mixer, beat the butter well with the pumpkin puree and sugar until smooth.
Step 4: Make The Batter
In another bowl, combine the flours, bicarbonate of soda, baking powder, spices, and salt. Next, add the flour combination to the pumpkin mixture and mix well.
Step 5: Sprinkle Pumpkin Seeds On Top Of The Batter
Transfer the batter to the bread pan then sprinkle pumpkin seeds on top.
Step 6: Bake Your Pumpkin Bread
Bake your pumpkin bread for 55 to 60 minutes. After baking, let the bread settle in the pan for 5 minutes then place it onto a cooling rack.
Step 7: Make The Cinnamon Syrup
Add 1 tablespoon of caster sugar along with water and a pinch of cinnamon to a small saucepan. Cook over low heat until the sugar melted. Drip the syrup on top of your pumpkin bread and you’re done! Wait until everything has cooled and serve!
Making gluten-free pumpkin bread will be as easy as pie after this.
10. Glutinous Rice Flour Pancake
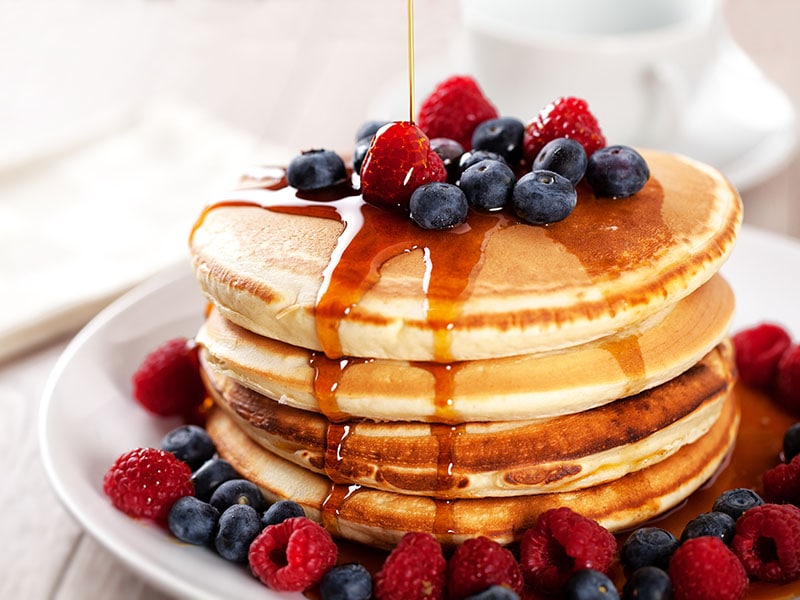
While other desserts in this list are indeed delicious, most of them take quite a bit of time to make. What if you just want to quickly cook up something for breakfast? In that case, you can’t go wrong with glutinous rice flour pancakes.
Necessary Ingredients
Since the goal of this recipe is to keep things quick and simple, all ingredients are widely available in any grocery store.
- Rice flour: ⅔ cup (80 grams)
- Glutinous rice flour: ⅔ cup (80 grams)
- Baking powder: 2 teaspoons
- Baking soda: ½ teaspoon
- Salt: 1 pinch
- Milk: ½ cup
- Honey: 3 tablespoons
- Light olive oil: 2 tablespoons
- Egg: 1
How To Make Glutinous Rice Flour Pancake
These luscious rice flour pancakes will only take you about 15 minutes!
Step 1: Prepare The Dry Ingredients
Add rice flour, glutinous rice flour, baking powder, baking soda and a pinch of salt to a mixing bowl and whisk well.
Step 2: Prepare The Milk Mixture
In another bowl, pour in the milk, oil (or melted butter), honey, egg yolk and beat well.
Step 3: Combine The Dry And Wet Mixture
Add the wet mixture to the bowl of dry mixture and mix well using a spatula until you have a lumpy batter.
Step 4: Fold In The Egg White
Beat the egg white until it bubbles then fold it into the batter.
Step 5: Make The Pancakes
Lightly grease your pan or skillet then put it on low-medium heat. Add ¼ cup of batter into the pan. When the pancake turns golden brown at the bottom, flip and cook for less than 1 minute more.
Step 6: Serve With Maple Syrup
Enjoy your pancake with maple syrup, whipped cream, or fresh fruit.
If You Have The Time, Try Them All!
Having rice flour in your kitchen opens up a door to a new world of gastronomy. If you asked me which one of the above recipes I recommended the most, I’d say you should try all of them!
Have you made your pick? Do you have any other rice flour recipes that you’d like to share? After trying these recipes, let me know what you think about them in the comment! It will also be a big help if you could like and share this article, so please do.
Nutrition Facts
6 servings per container
- Amount Per ServingCalories197
- % Daily Value *
- Total Fat
6.2g
10%
- Saturated Fat 0.9g 0%
- Cholesterol 29mg 10%
- Sodium 215mg 9%
- Potassium 220mg 7%
- Total Carbohydrate
32.7g
11%
- Dietary Fiber 1g 4%
- Sugars 10.2g
- Protein 3.3g 6%
- Calcium 103%
- Iron 1%
- Vitamin D 3%
* The % Daily Value tells you how much a nutrient in a serving of food contributes to a daily diet. 2,000 calories a day is used for general nutrition advice.
References
- Contributors to Wikimedia projects, (2007b). Rice flour – Wikipedia.

