Vietnamese mooncakes are a staple during the Mid-Autumn festival (“Tết Trung Thu”) in Vietnam. When I was still a kid, I used to eagerly wait for the 15th of August on the Lunar calendar, the day when Tet Trung Thu occurs, to enjoy these delectable cakes.
Now that I’m a grown-up, my love for Banh Trung Thu hasn’t changed one bit. In fact, the more I know about the deep-rooted traditions and the meanings behind these cakes, the more I come to appreciate them.
In today’s post, I’ll introduce to you a delicious Banh Trung Thu recipe that everyone can make. Not only do these cakes make for excellent desserts or snacks, but they’re also a gateway to learning more about Asian culture!
Banh Trung Thu – A Cake With Many Meanings
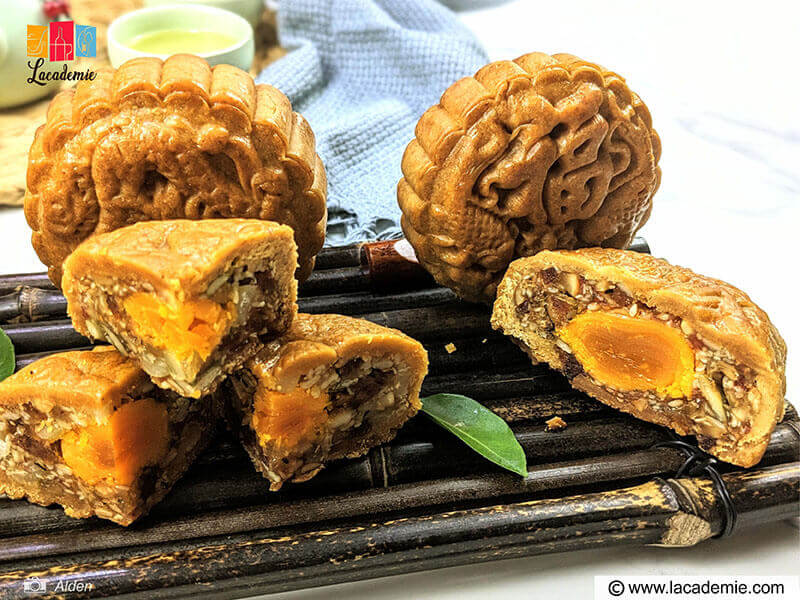
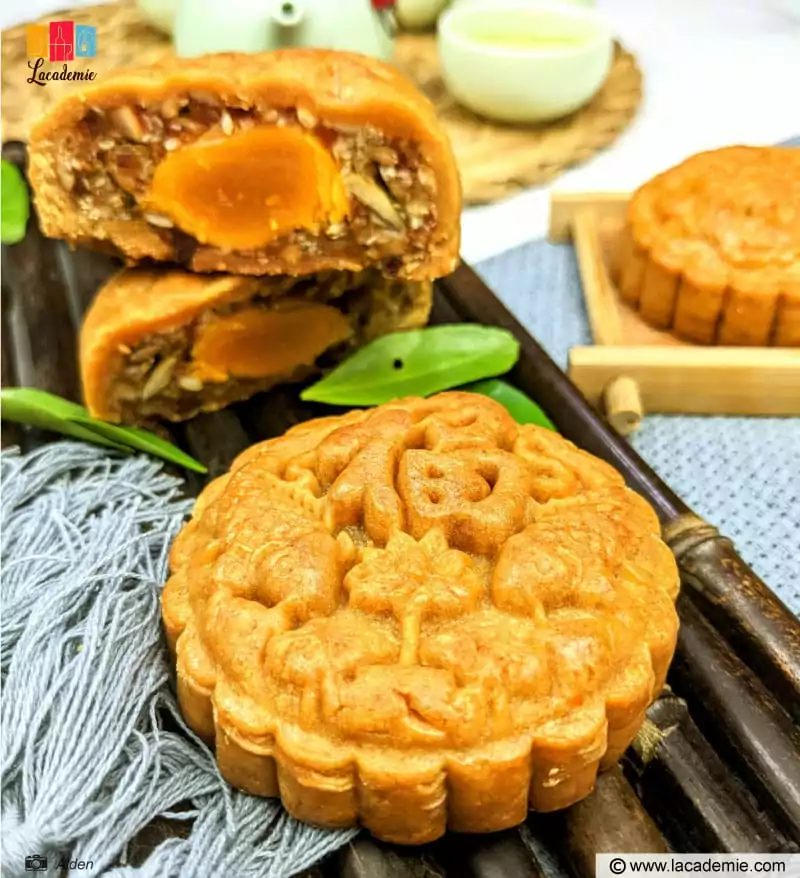
Originating from China, moon cakes are a traditional treat eaten during the Mid-Autumn Festival in many Asian countries. In Vietnam, there are two main types of mooncakes: baked mooncakes (the one I’ll show you how to make in this post) and sticky rice mooncakes.
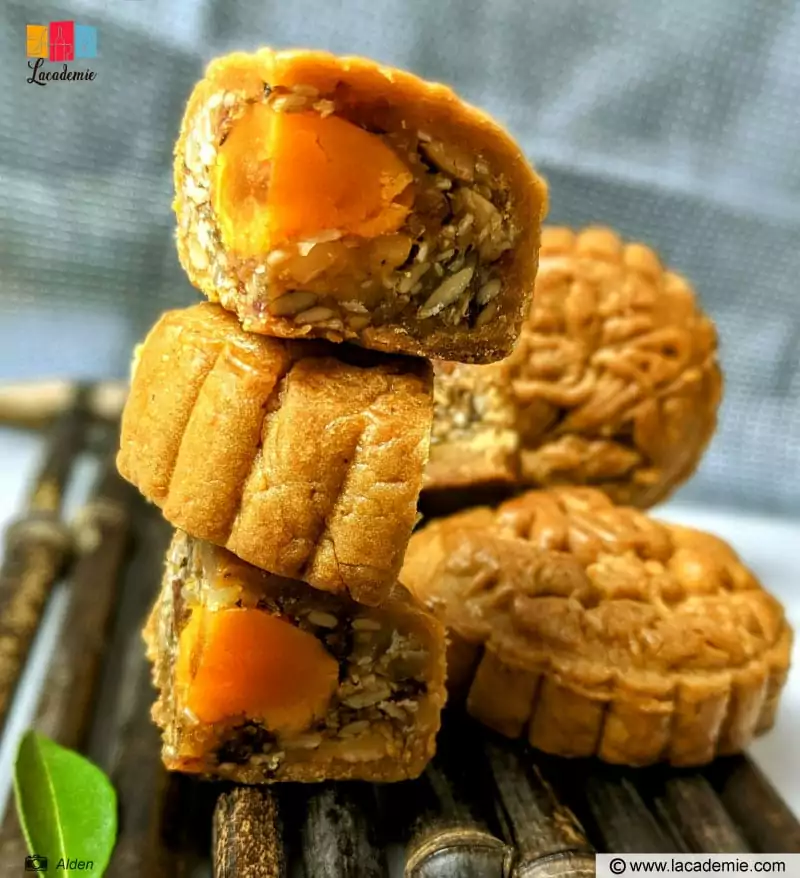
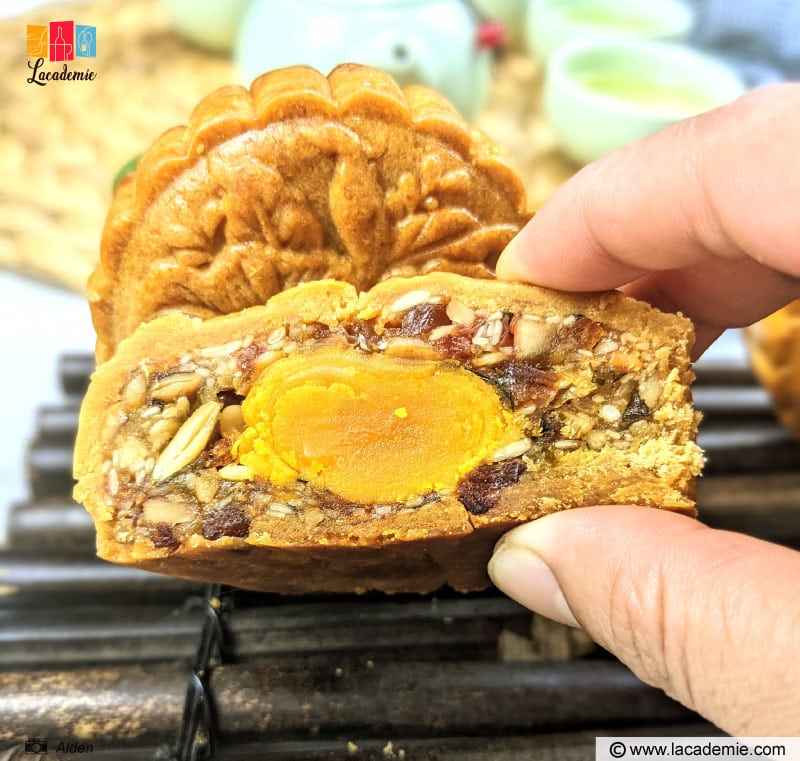
These festive treats typically come in round, sometimes square, shapes with beautiful patterns on the surface. They usually have two kinds of fillings: savory fillings that include sausage, watermelon seeds, salted egg yolks, etc., and sweet fillings made from mung beans, lotus seed paste, coconut, and more.
As mentioned above, Tet Trung Thu takes place on the 15th of August (Lunar calendar), when there’s a full moon. In ancient times, this festival was held to celebrate a successful harvest season and honor the blessing of the moon.
In modern times, the Mid-autumn festival is a time of reunion when family and friends gather to enjoy delicious mooncakes with a cup of hot tea on the side. In addition, you can also see many lion and dragon dance performances during this time of the year.
On the night of the 15th, groups of children will light up colorful lanterns and walk around the neighborhood while singing songs about the legend of The Moon Goddess (“Chị Hằng”). This activity is called “the lantern parade” (“rước đèn Trung Thu”) and was one of my favorite things to do when I was a kid.
Tools
I’ll be honest with you, Banh Trung Thu is not the most straightforward treat to make. As a result, the list of required tools is a bit longer than usual. However, your hard work will pay off in the end!
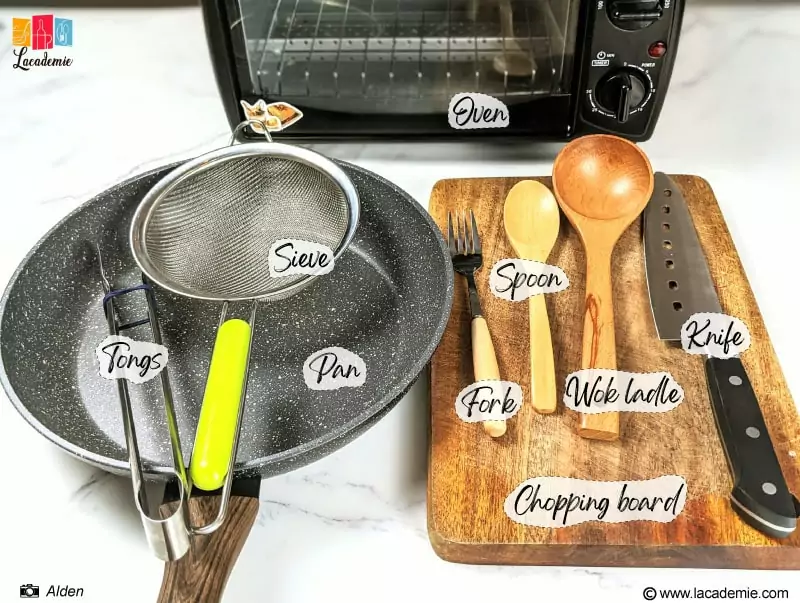
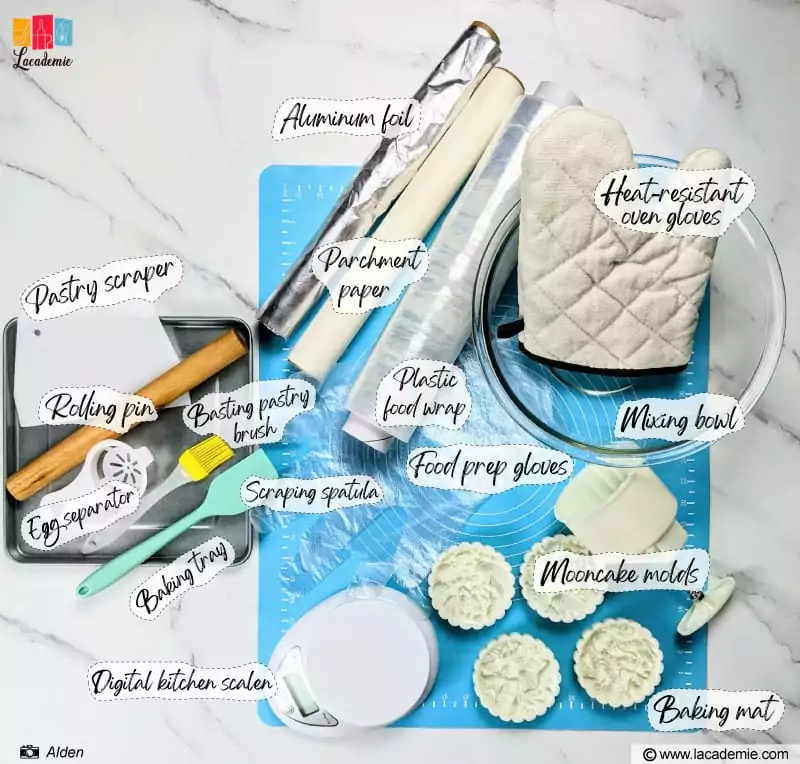
- Mooncake molds: These molds help you make beautifully-shaped mooncakes with eye-catching patterns.
- Oven: For baking the mooncakes.
- Mixing bowl: For mixing the ingredients.
- Sieve: Sifting the flour ensures a smooth dough.
- Egg separator: This handy tool allows you to separate the egg yolk and egg white in just seconds.
- Scraping spatula: For mixing the dough.
- Chopping board: Gives you a flat surface to cut and dice the dry ingredients.
- Knife: For cutting the ingredients.
- Wok ladle: For toasting the seeds.
- Spoon: For mixing the filling.
- Basting pastry brush: For brushing oil over the salted eggs, molds, and cakes.
- Baking tray: For baking the cakes and eggs.
- Aluminum foil: For lining the baking tray before baking the salted eggs.
- Parchment paper: Line your baking tray with parchment paper before baking the cakes.
- Baking mat: This makes for a great surface to knead the dough.
- Rolling pin: For rolling the dough.
- Pastry scraper: For dividing the dough.
- Fork: For mixing the egg mixture.
- Food prep gloves: For making the filling.
- Heat-resistant oven gloves: For taking the cakes out of the oven.
- Plastic food wrap: For covering the bowl when you let the dough or filling rest.
- Digital kitchen scale: For measuring the ingredients and ensuring that you get the filling-to-crust ratio right.
Ingredients
Since this recipe is for the savory version of mooncake. You’ll be using many different ingredients for the filling. As for the dough, wheat flour will be the base.
For the dough
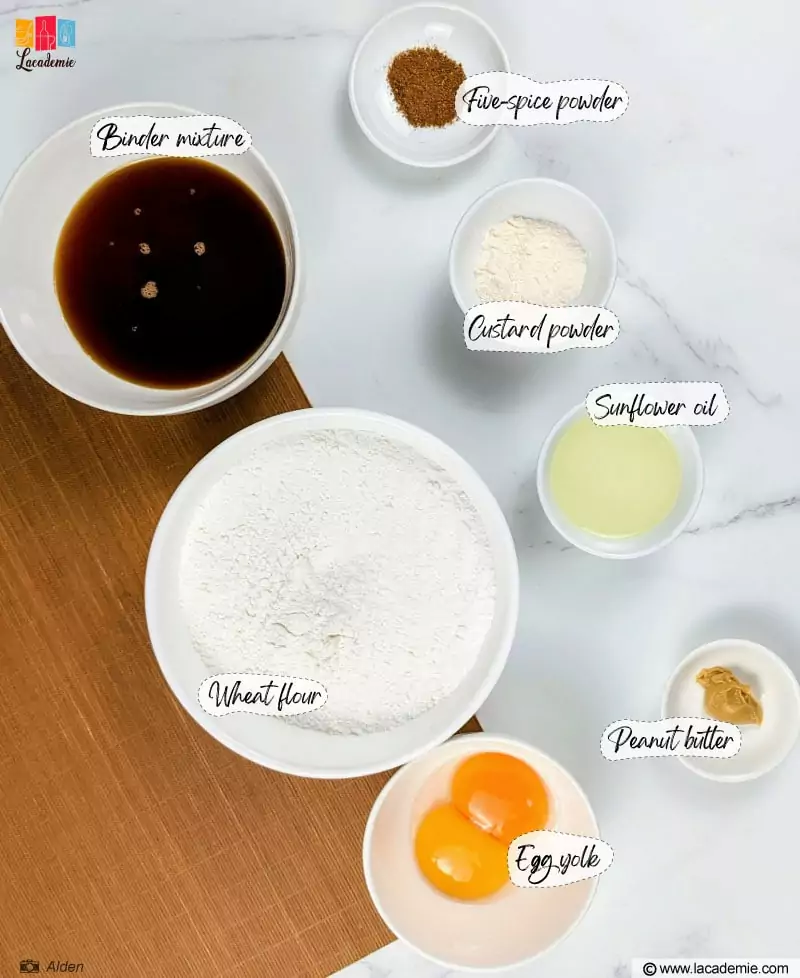
- Wheat flour: Cake flour and bread flour are the best choices. Cake flour yields a softer dough, making it a better option if you plan to eat the cakes right away. Bread flour and all-purpose flour will result in a drier and firmer crust, which is ideal if you want to store the cakes for a long time or give them to others. Personally, I prefer bread flour.
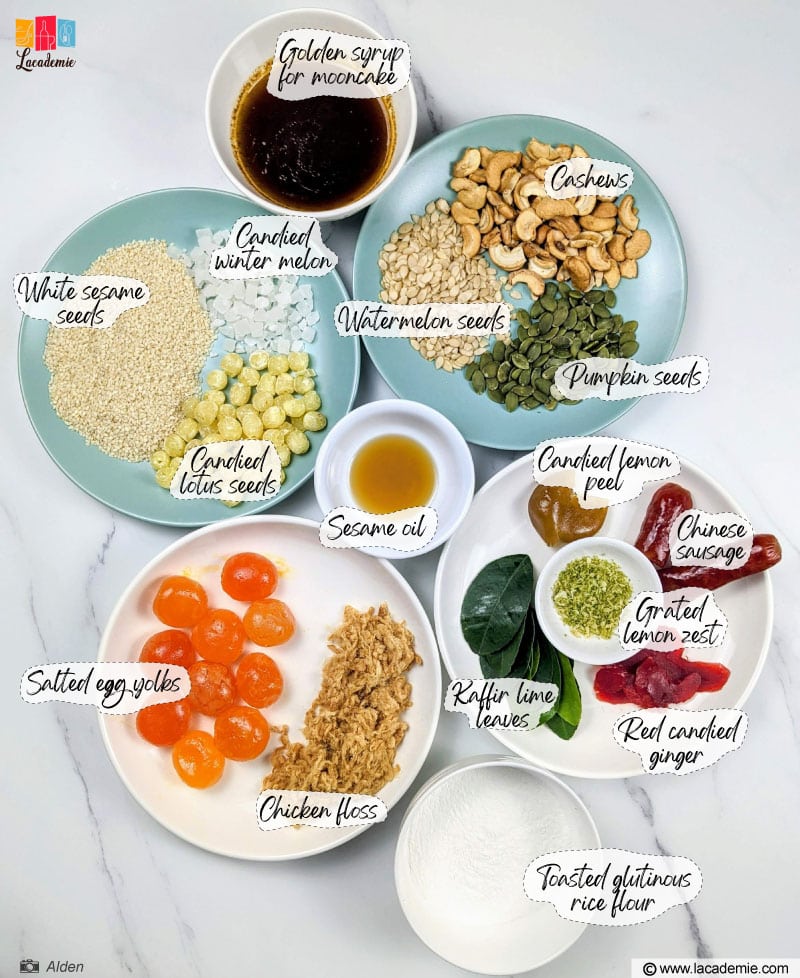
- Golden syrup for mooncake: This is the secret ingredient behind delicious mooncake dough. The syrup enhances the dough’s flavor and fragrance and gives it a more appetizing color.
- Sunflower oil: Peanut oil and coconut oil are viable alternatives.
- Egg yolk: Either chicken or duck egg is fine, but the dough will have a darker color when you use duck egg.
- Peanut butter: Adds some fattiness to the dough and improves its texture.
- Five-spice powder: only add this ingredient to the dough when you make moon cakes with a savory filling.
- Custard powder: Elevates the aroma of the dough.
For brushing the cake surface
- Egg mixture: Made from egg yolk, egg white, and sesame oil. This mixture gives the cake more sheen.
For the cake filling
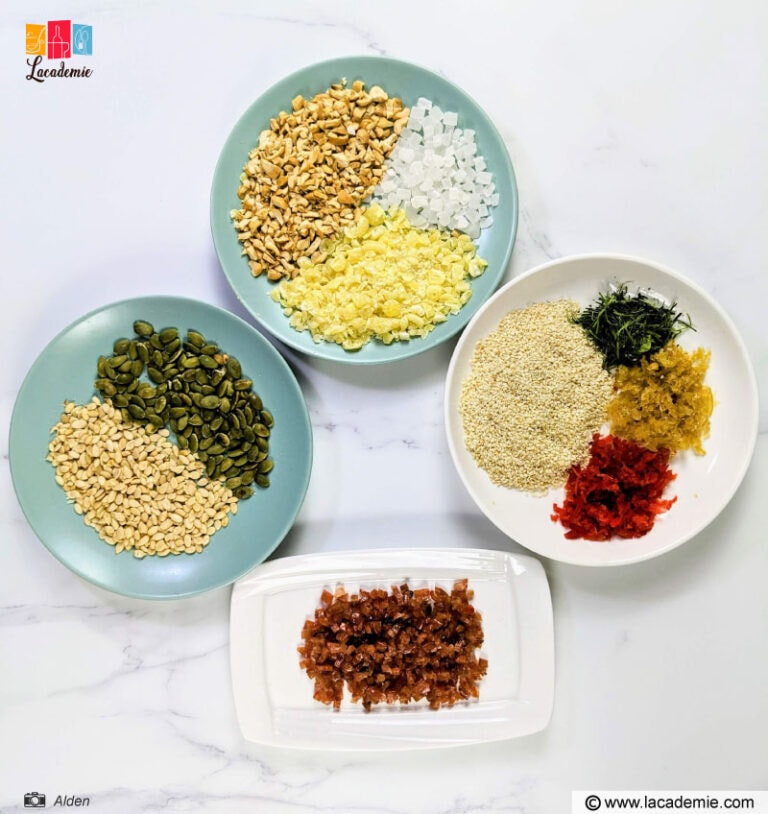
- Seeds and nuts: Pumpkin seeds, watermelon seeds, cashews or almonds, white sesame seeds.
- Candied veggies and fruits: candied winter melon, candied lotus seeds, red candied ginger, candied lemon peel.
- Chinese sausage (lap cheong): Salty and sweet dried sausage with a beautiful reddish color.
- Five-spice powder: Classic spice used in Chinese and Asian cooking.
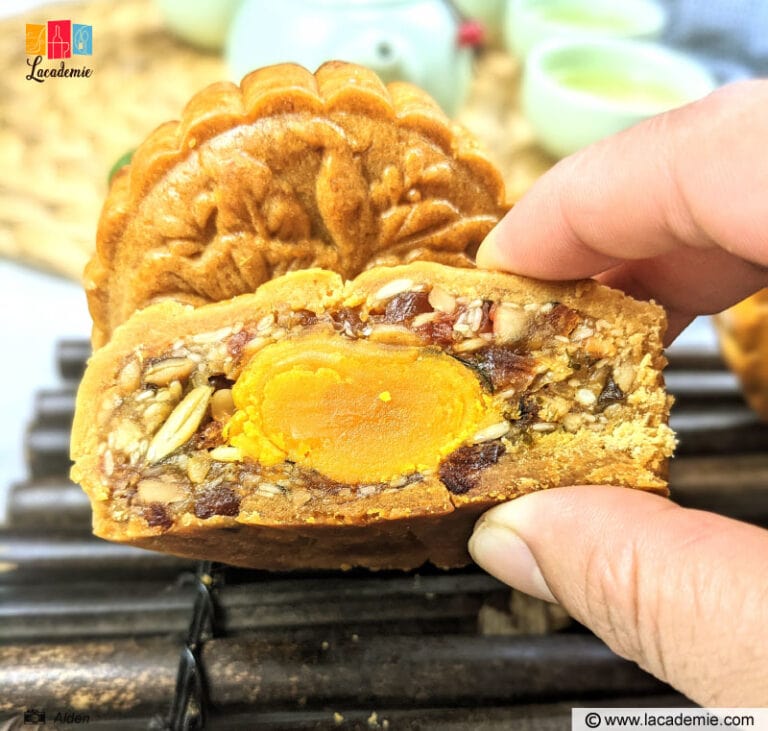
- Salted egg yolks: Some people believe that the egg yolk symbolizes the bright full moon.
- Chicken floss: The Vietnamese people call this ingredient “chà bông gà”. It has a savory taste and a unique texture.
- Kaffir lime leaves: Kaffir lime is a citrus cultivar used widely in South East Asian cuisine. The leaves of these small fruits boast a strong citrusy flavor.
- Grated lemon zest: Opt for the regular yellow lemon.
- Sesame oil: For brushing the salted egg before baking.
For binding the filling
- Binder mixture: Made with sesame oil, Mei Kuei Lu wine, and five-spice powder. This mixture improves the filling consistency.
- Bột bánh dẻo (flour for sticky rice mooncake): For mixing with the binder mixture. You can also use toasted glutinous rice flour.
Directions
In this section, I’ll guide you through every step to make an authentic Banh Trung Thu. Certain steps can be a bit tricky, so make sure that you follow the instructions carefully.
Step 1: Make The Golden Syrup
First of all, you should make the golden syrup at least 2 weeks in advance. Don’t use “fresh-off-the-stove” syrup, as it can make the cakes more prone to molds.
If you don’t have time to prepare the syrup, you can use store-bought products instead. Look for “nước đường bánh nướng” in Asian stores.
Place a pot on the stove and boil about 0.6 quarts (600 milliliters) of water. Once the water is boiled, add 1.1 pounds (500 grams) of granulated sugar and 1.1 pounds (500 grams) of brown sugar. Stir until the sugar fully dissolves.
Bring the sugar-water mixture to a boil, then reduce the heat and skim off the foam.
Add the juice and peel of 1 lemon to the pot. You should let the inside part of the peel face upward. Note that you should not stir the sugar while boiling. It’s also unnecessary to stir after adding the lemon juice.
Simmer on low heat for about 50 to 65 minutes. After that, remove the pot from heat and remove the lemon peel. Allow the syrup to cool completely, then transfer it to a sealed glass jar.
This recipe yields about 2.6 pounds (1.2 kilograms) of sugar syrup. You only need to use 0.55 pounds (250 grams) to make the mooncakes.
Step 2: Make The Dough
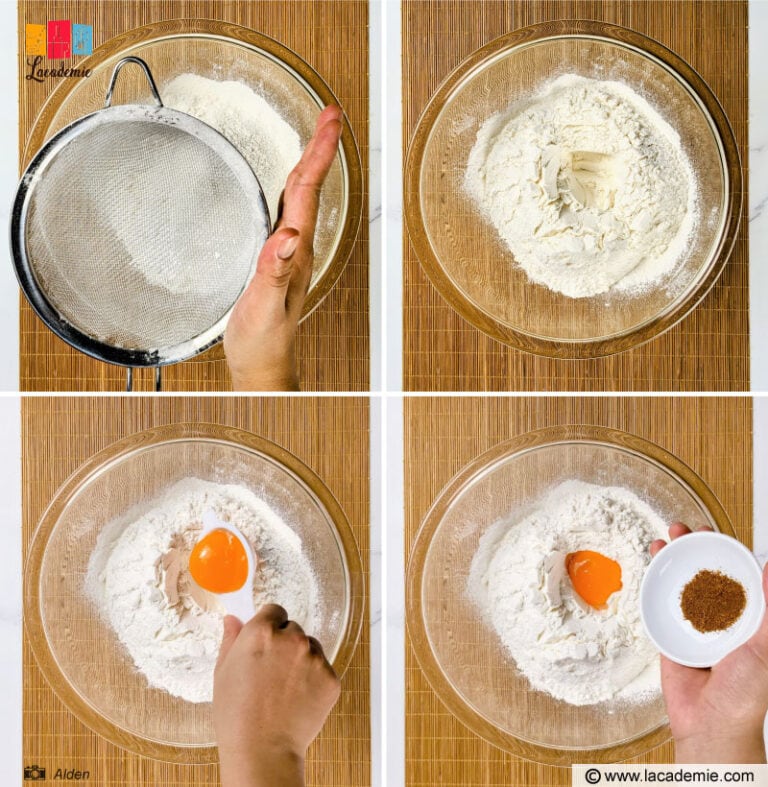
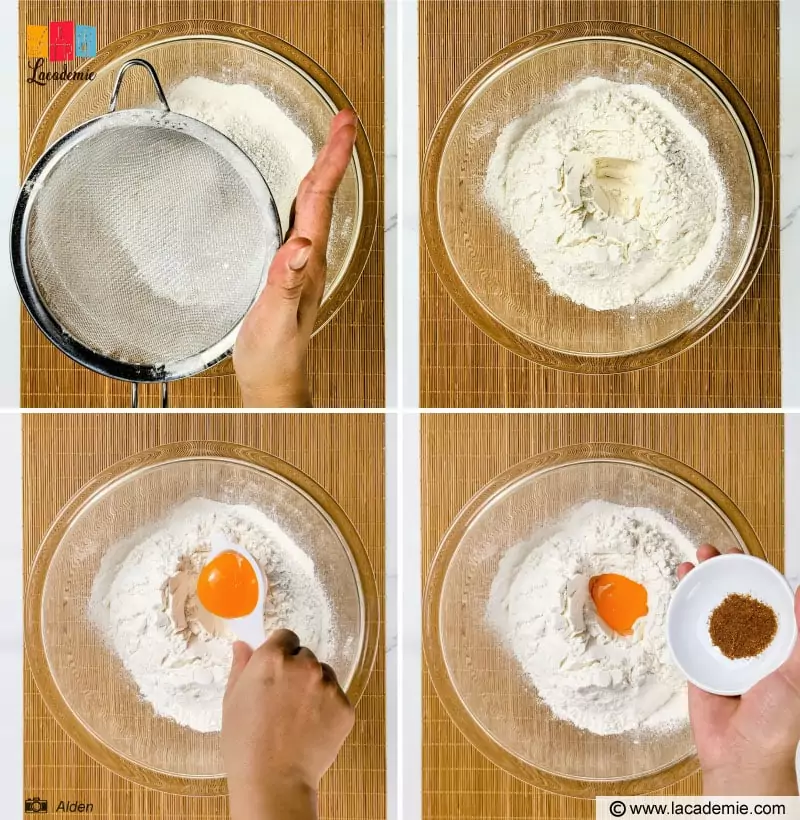
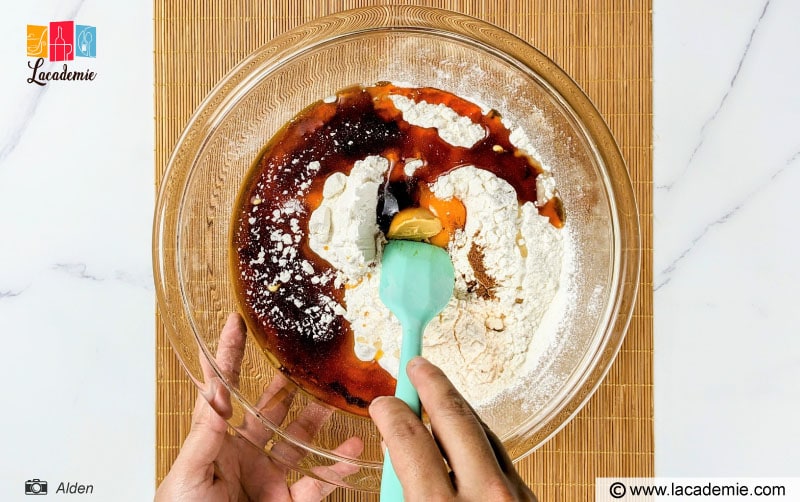
Sift the flour into a large, deep bowl, making sure that there are no lumps.
Make a hole in the middle of the sifted flour and add an egg yolk to that hole. The yolk will help the dough to be fragrant and retain its moisture.
Next, add 0.1 ounces (3 grams) of five-spice powder.
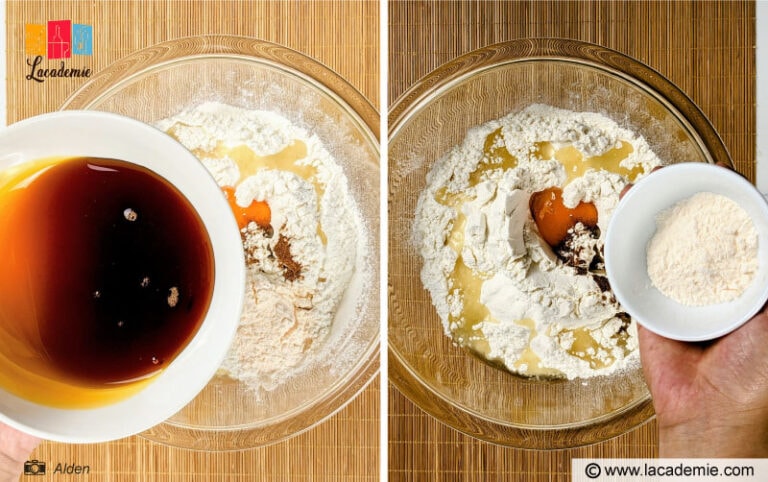
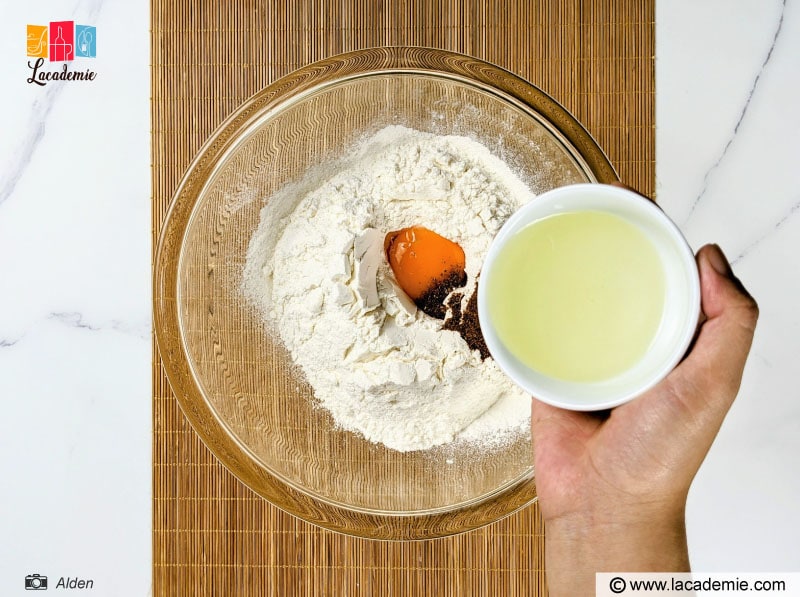
Pour in 1.8 ounces (50 grams) of sunflower oil or peanut oil. The oil will make the dough smoother and softer. However, too much oil will result in a wet dough that’s more prone to spoiling.
You can also opt for coconut oil if you like the unique flavor and aroma that this oil adds to baked goods. Note that you shouldn’t use other kinds of oil as they can cause the dough to be too oily.
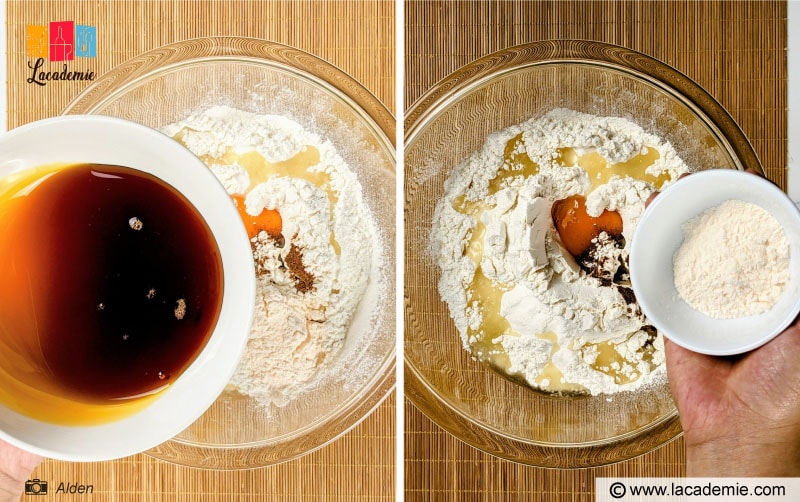
Add 250 grams of golden syrup and 0.4 ounces (12 grams) of custard powder.
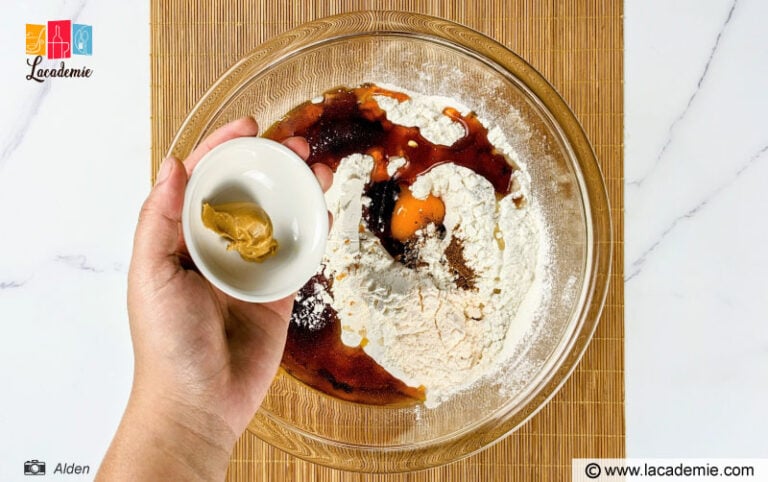
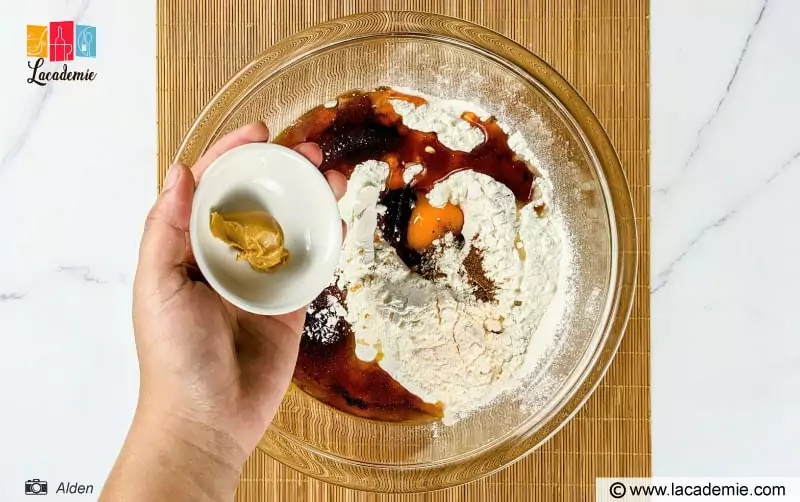
Then, stir in 15 grams of peanut butter. If you use peanut oil instead of sunflower oil, feel free to skip this step.
If you like a softer dough, you can add about 2 grams of baking soda. Note that a traditional Vietnamese mooncake won’t be this soft.
Note: If you find the dough to be too wet or dry after mixing, you can add more flour or golden syrup accordingly.
Step 3: Mix The Dough
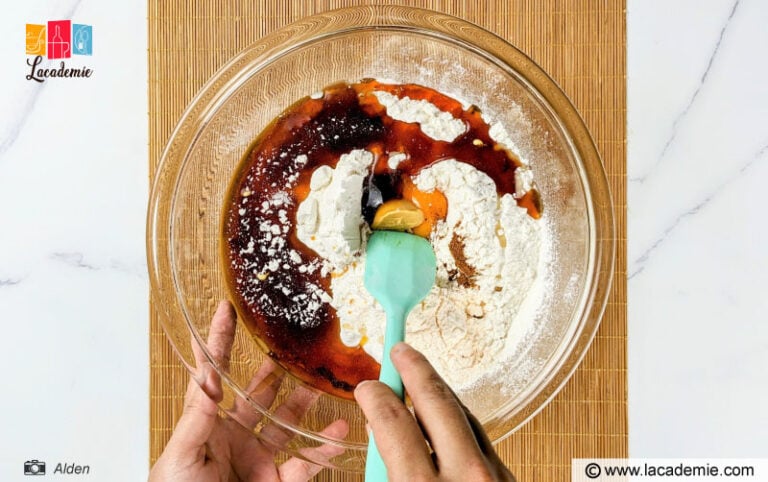
Use a scraping spatula to mix the dough. You can also use a spoon if you don’t own this tool.
Mix well until combined. The dough will be a bit wet at first. If the dough is dry and crumbly, add a little more golden syrup and oil.
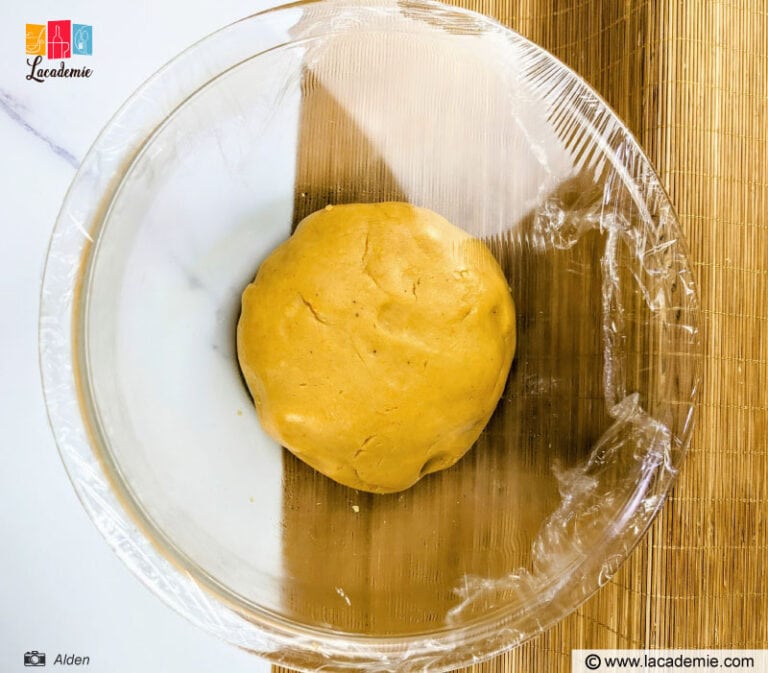
Cover the dough with plastic wrap so that air does not get in, and dry it out. Let the dough rest for about 30 to 45 minutes.
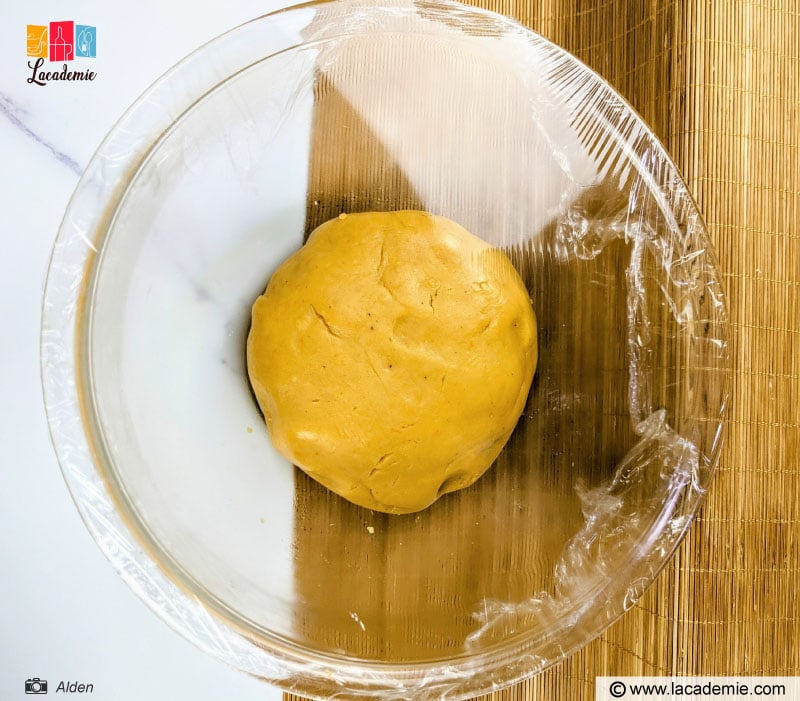
Note: Be careful not to overmix the dough. You only need to mix until all the ingredients are combined. More importantly, do not knead the dough.
Step 4: Prepare The Ingredients For The Filling
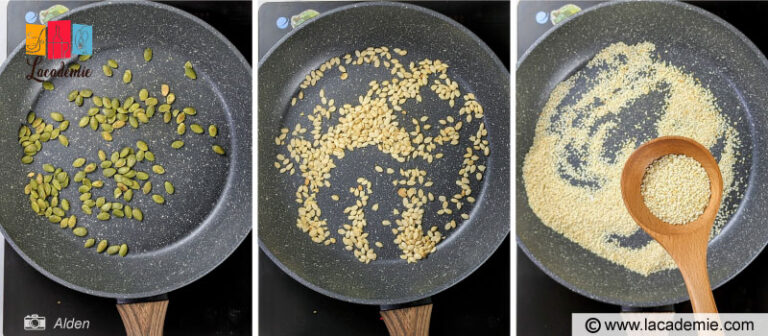
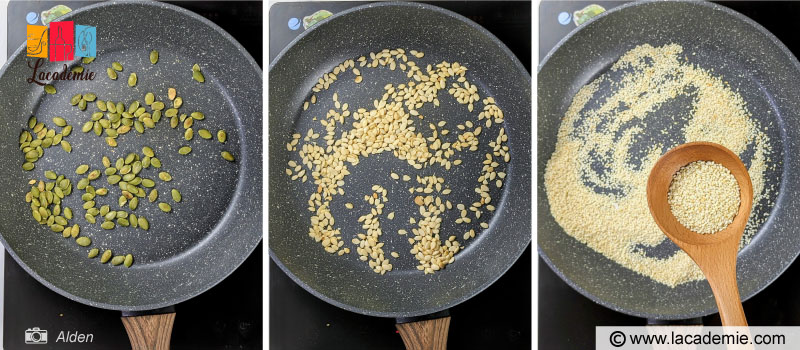
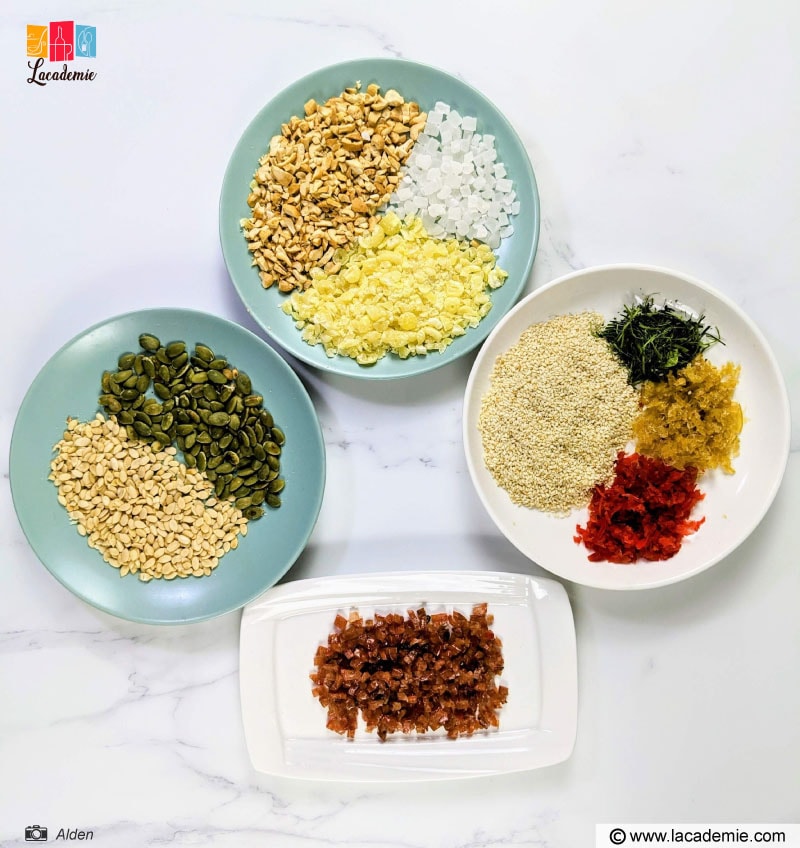
Roast the pumpkin seeds, watermelon seeds, and white sesame seeds until golden.
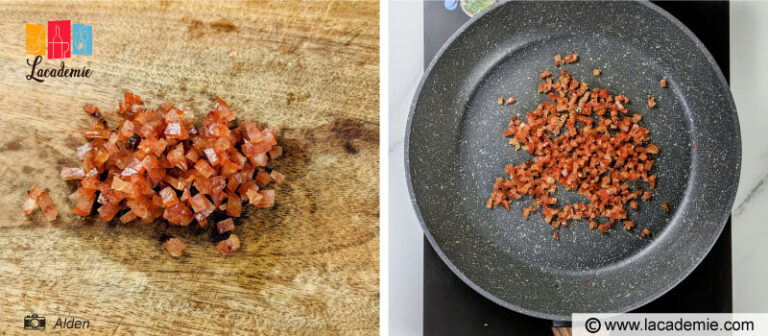
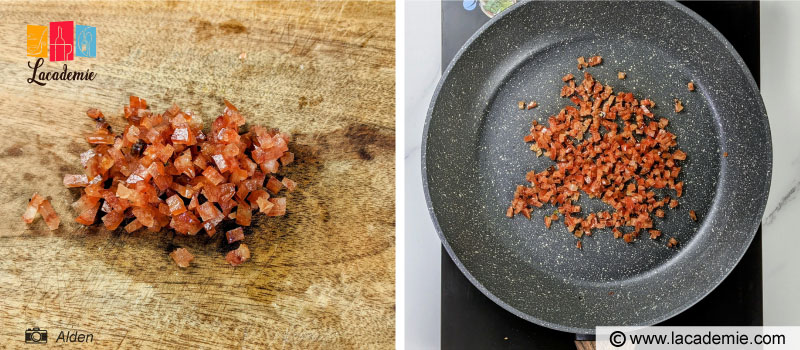
Dice and roast the Chinese sausage.
Finely dice the cashews and candied lotus seeds.
Mince the red candied ginger and candied lemon peel. The finer you mince them, the more delicious the filling will be.
Mince the lime leaves.
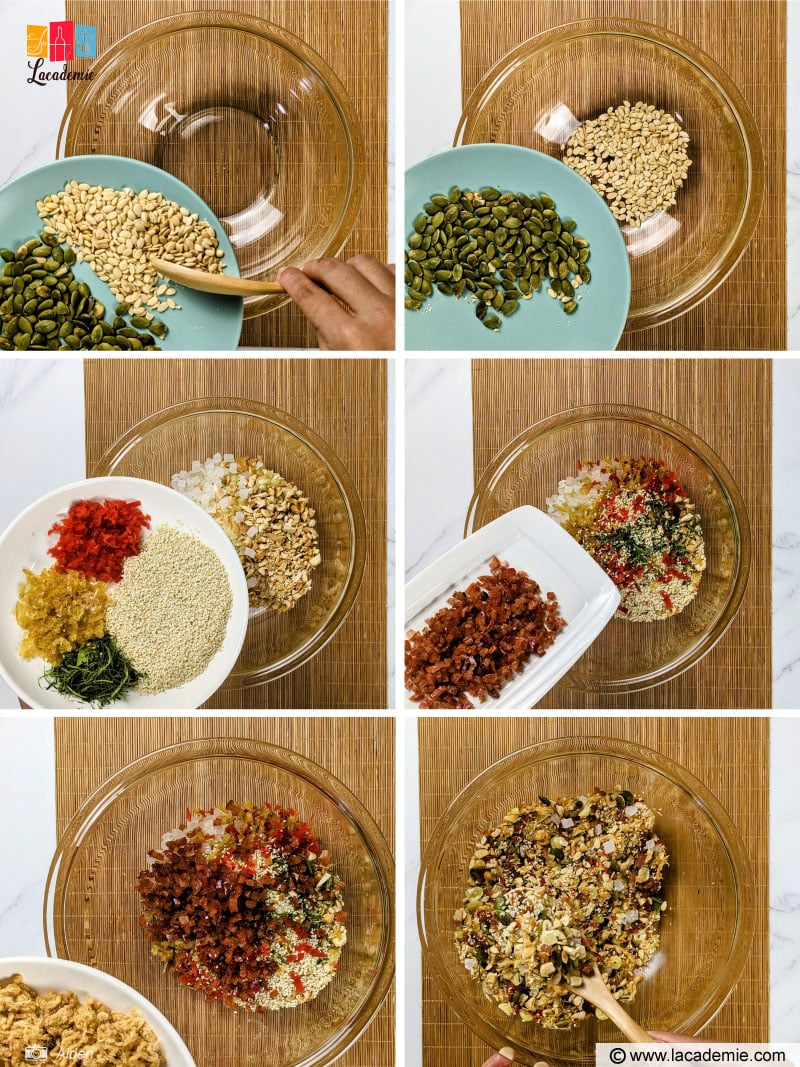
Step 5: Mix The Filling
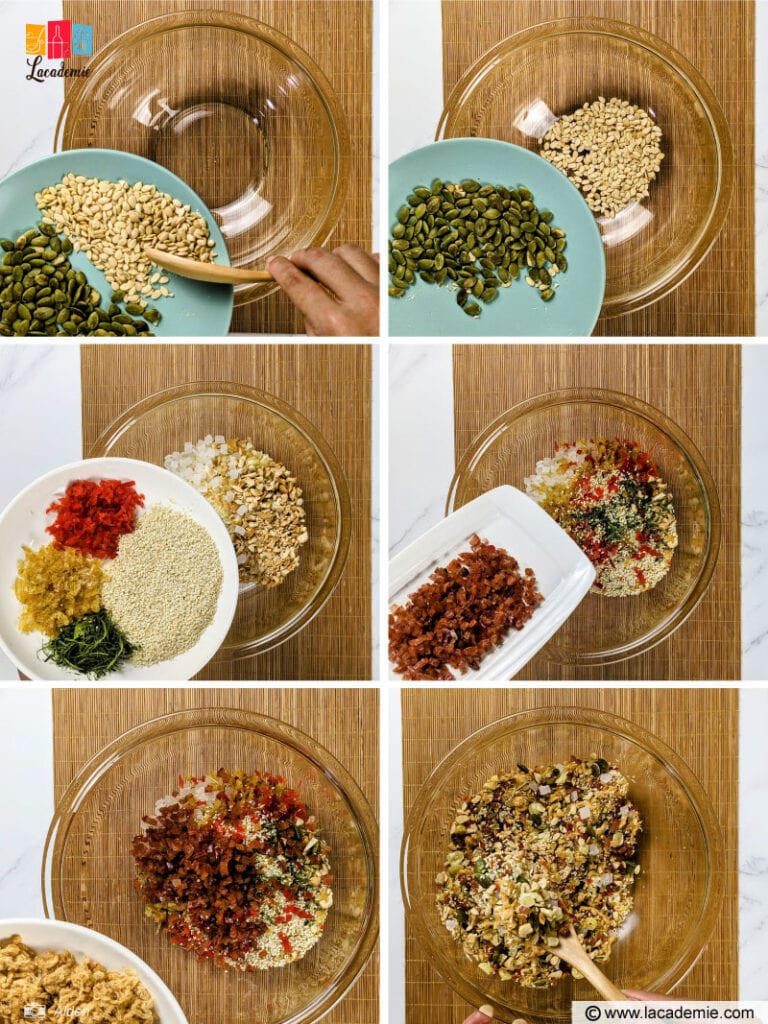
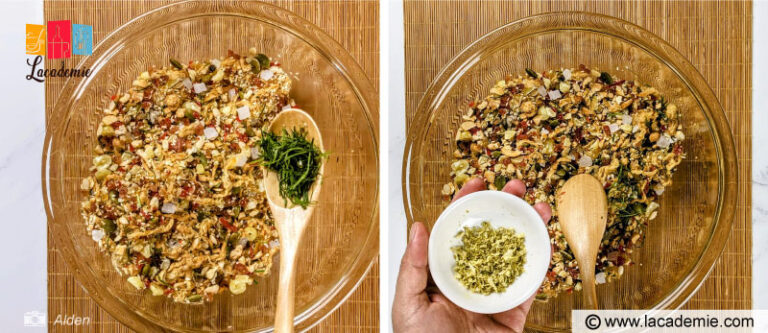
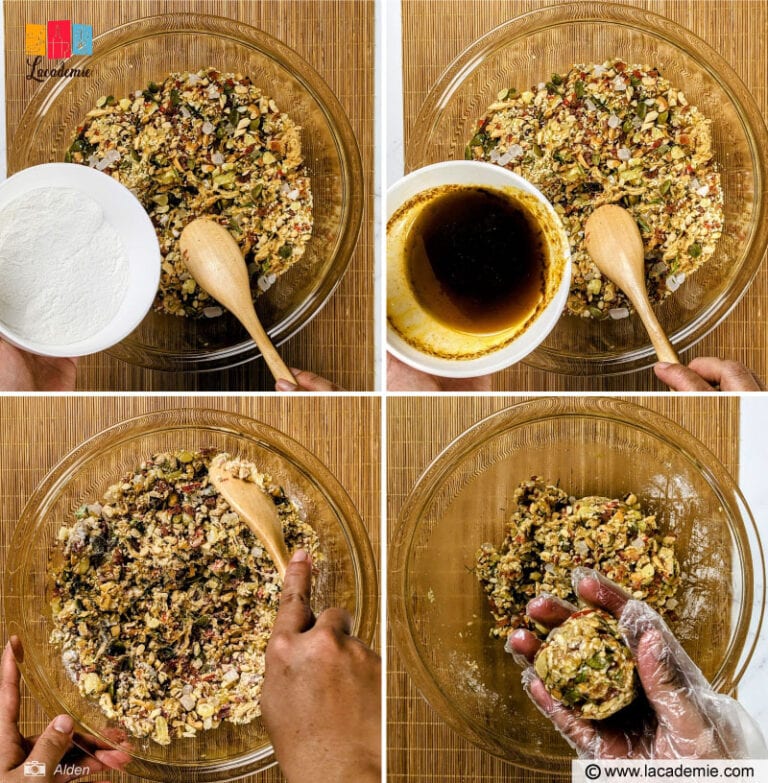
Put all the ingredients for the filling into a mixing bowl, except the grated lemon zest. Note that you only need to add half the lime leaves. Mix well using a spoon.
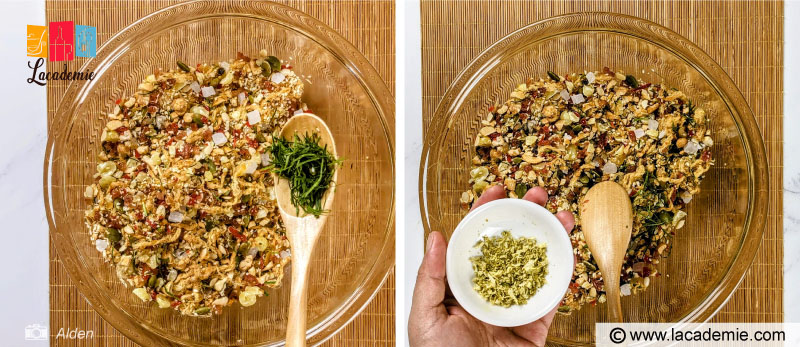
After combining the ingredients, mix in the remaining lime leaves and lemon zest.
Gradually add the toasted glutinous rice flour, sesame oil, five-spice powder, and Mei Kuei Lu wine until the filling binds together. Try rolling a small ball from the filling to test its consistency.
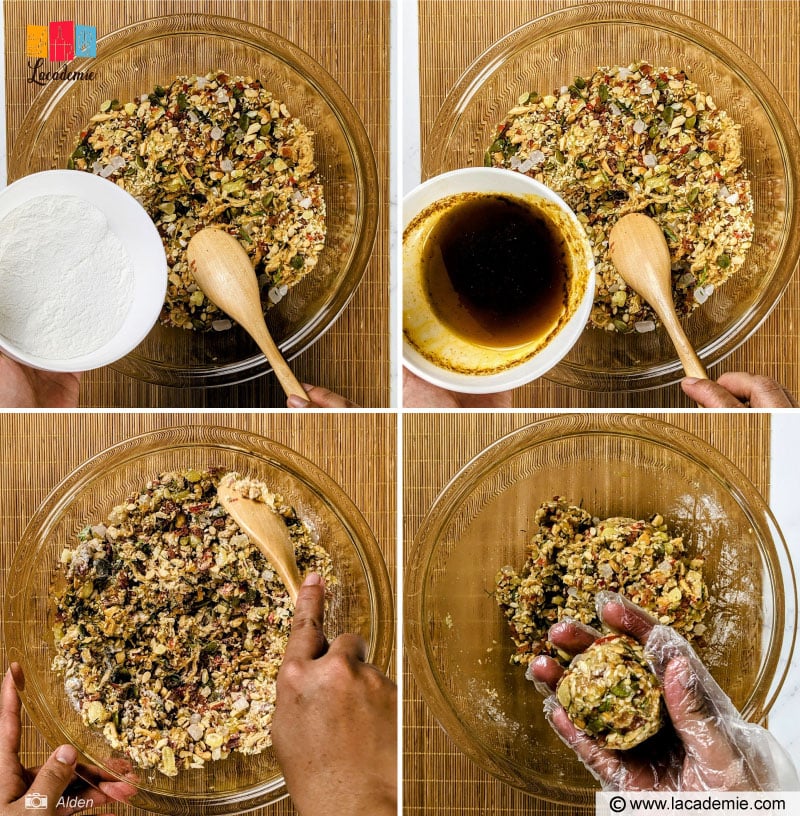
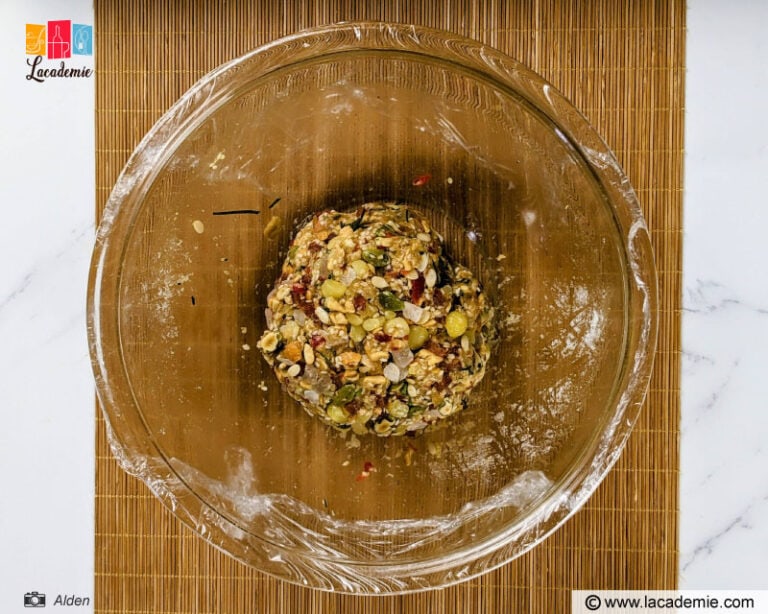
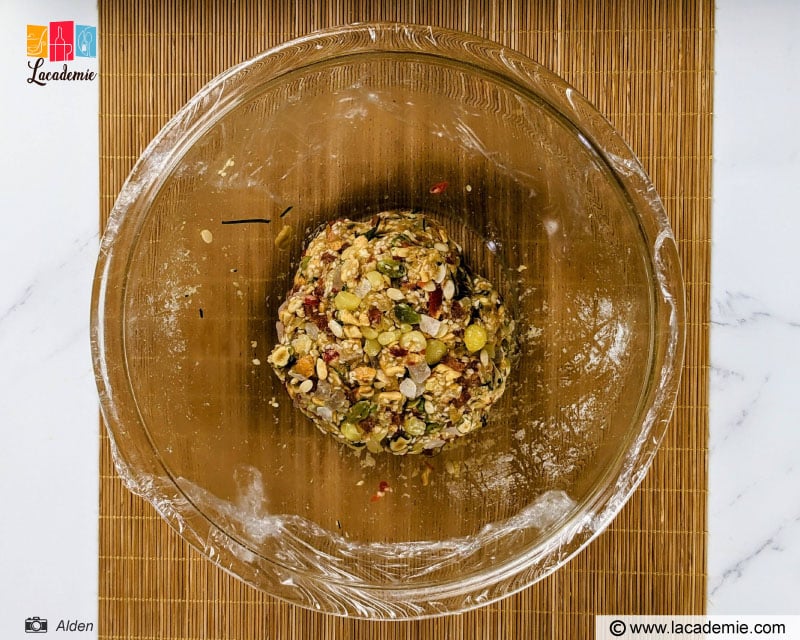
When the filling has the right consistency, roll it into a big ball and cover the bowl with plastic wrap. Allow it to rest for about 3 minutes.
Step 6: Bake The Salted Egg
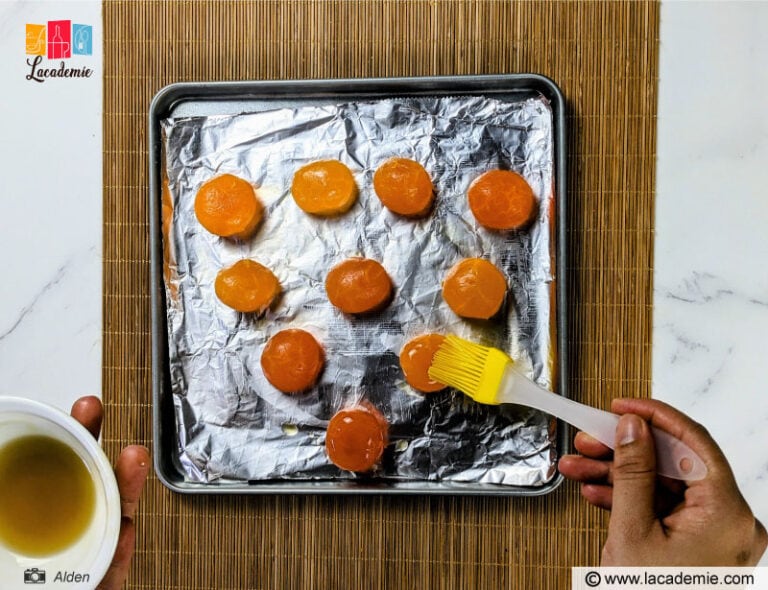
Wash the salted egg with wine. Line a baking tray with aluminum foil, and brush a thin layer of oil over the foil. Place the eggs on the lined tray. Brush sesame oil on the eggs.
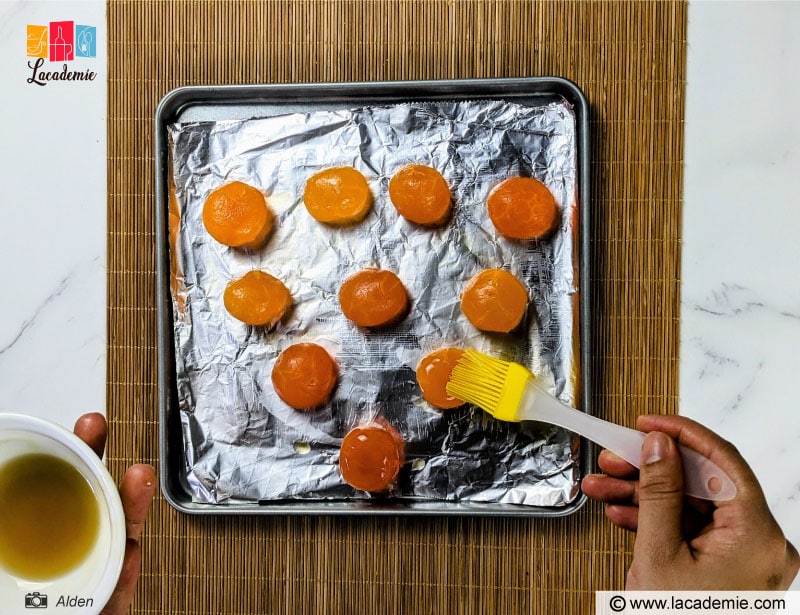
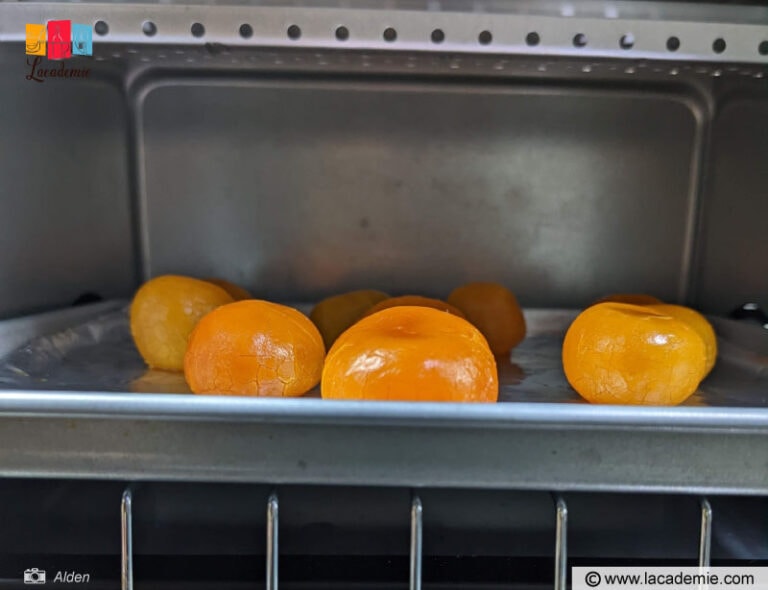
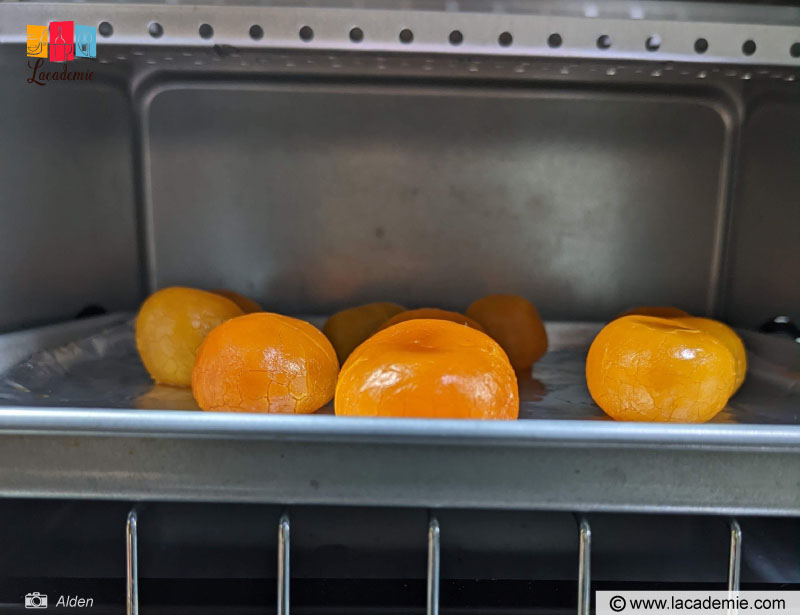
Preheat the oven to 320 degrees F (about 10 minutes). Bake the eggs for 5 minutes. Then, remove them from the oven and wait for them to cool.
Step 7: Decide The Dough To Filling Ratio
I’ll be making 10 150-gram cakes with a 65:85 dough-to-filling ratio. The dough is 65 grams, and the filling is 85 grams, including 15 grams of eggs and 70 grams of filling mixture.
If you prefer more filling and less dough, you can use the 1:2 ratio (50 grams of dough and 100 grams of filling). On the contrary, opt for a 1:1 ratio (75 grams flour and 75 grams filling) if you like a bit more dough.
Step 8: Form The Filling
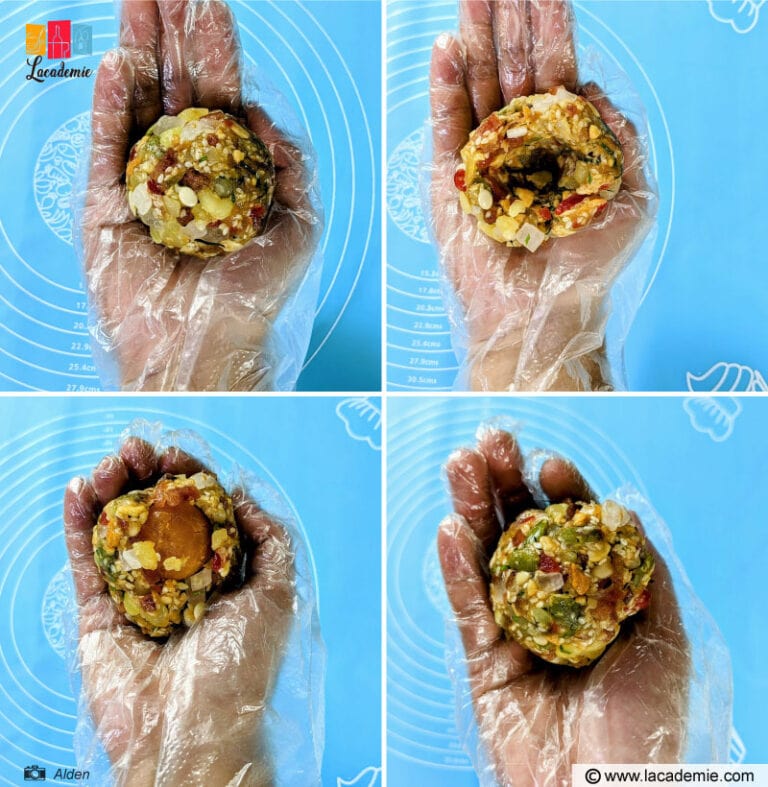
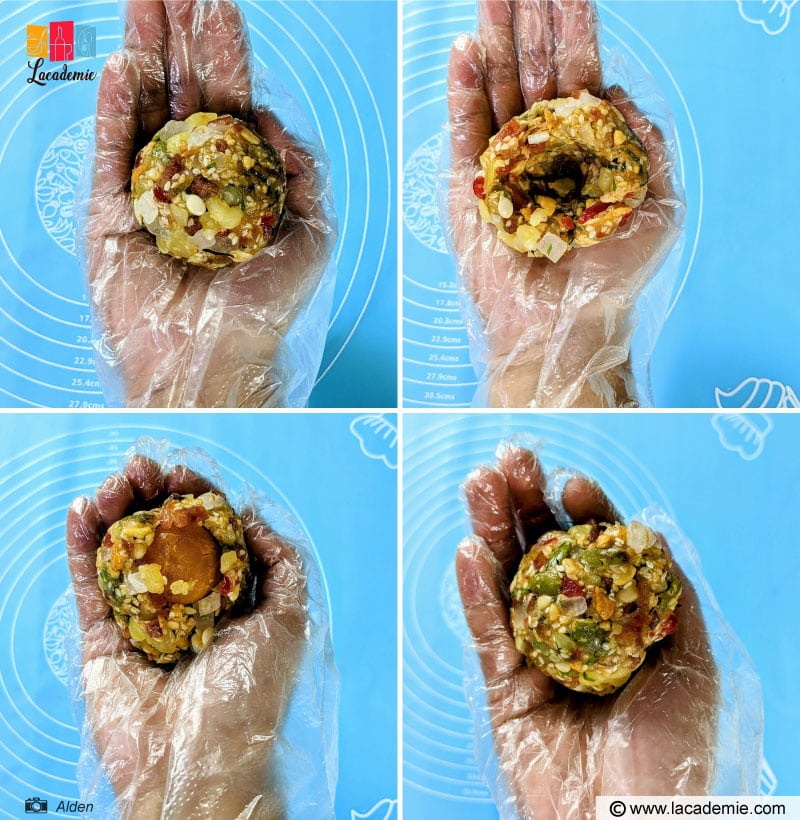
Divide the filling mixture into equal parts according to the ratio you choose. Make a hole in the middle of the filling and add in a salted egg. Then, firmly wrap the filling around the egg.
Step 9: Place The Filling Into The Dough
Once the dough has rested for long enough, it’ll become smoother and dryer. Prepare a flat surface to work on. I use a baking mat. Dust flour on the baking mat to prevent the dough from sticking. Then, knead the dough.
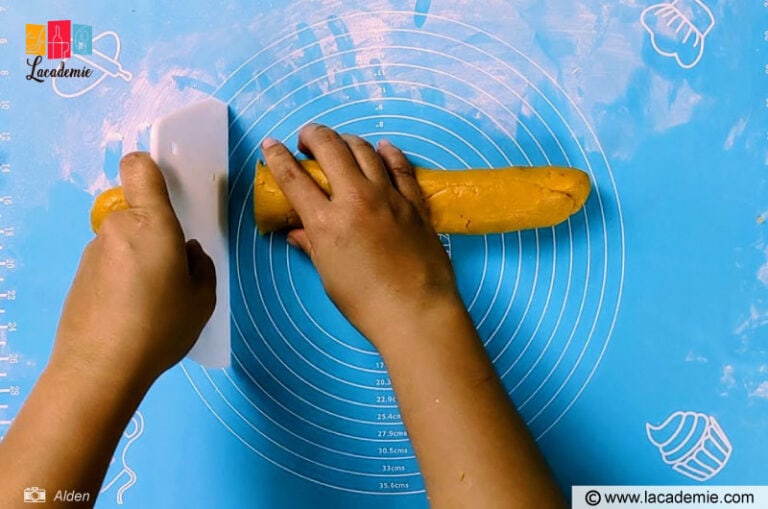
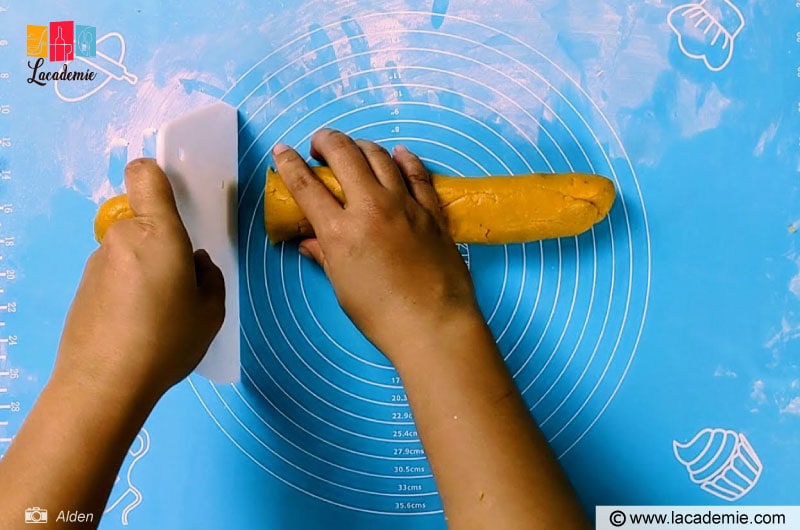
Shape the dough into a long block and divide it into smaller, equally-sized blocks. Weigh the blocks to make sure that they’re at the right weight based on the ratio.
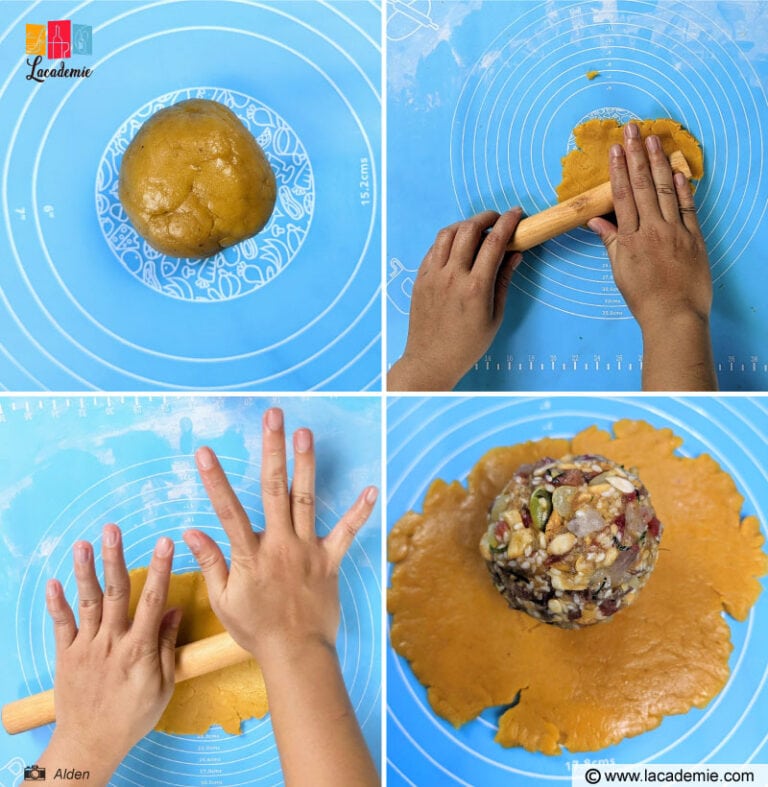
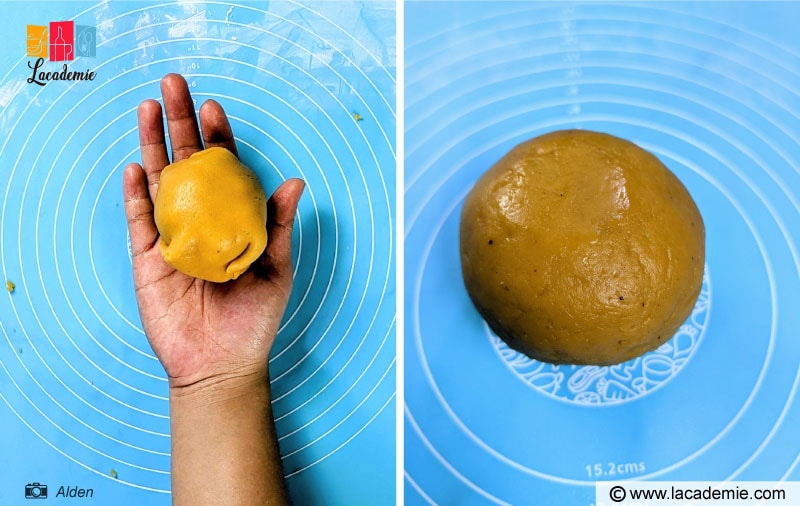
Roll the dough into balls. Gently press the dough with your hands and roll it into a circle using a rolling pin. The dough in the center should be a bit thicker than the part at the edge.
Place the filling in the center of the rolled dough.
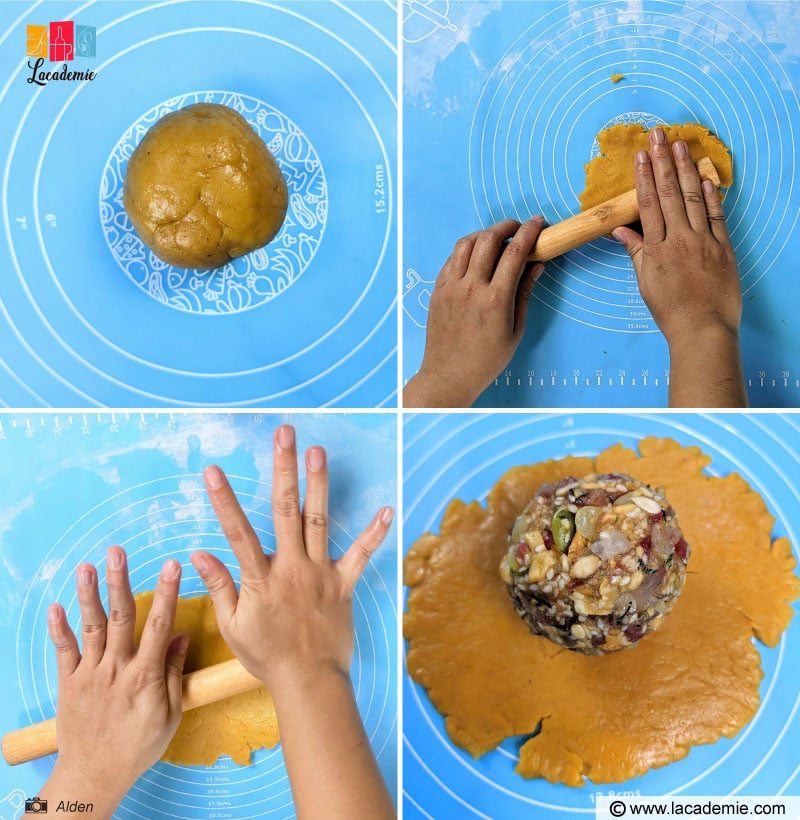
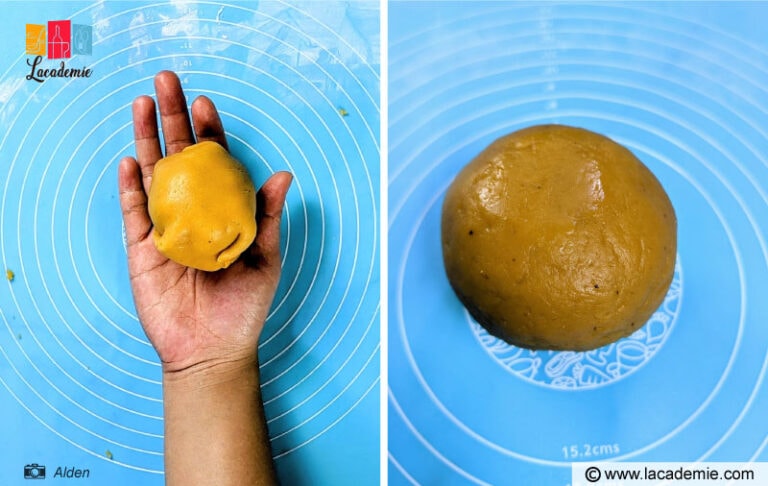
Turn the dough upside down and carefully wrap the dough around the filling. Carefully roll the dough into a ball. Repeat for the rest of the dough and filling.
Step 10: Put The Dough Into The Mold
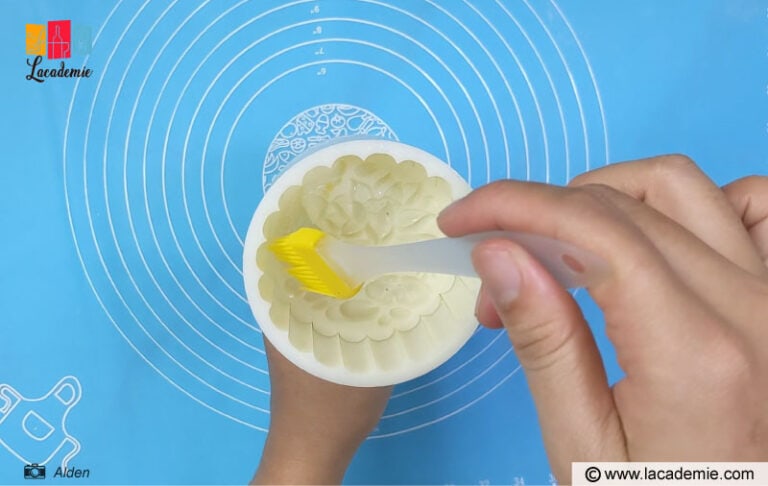
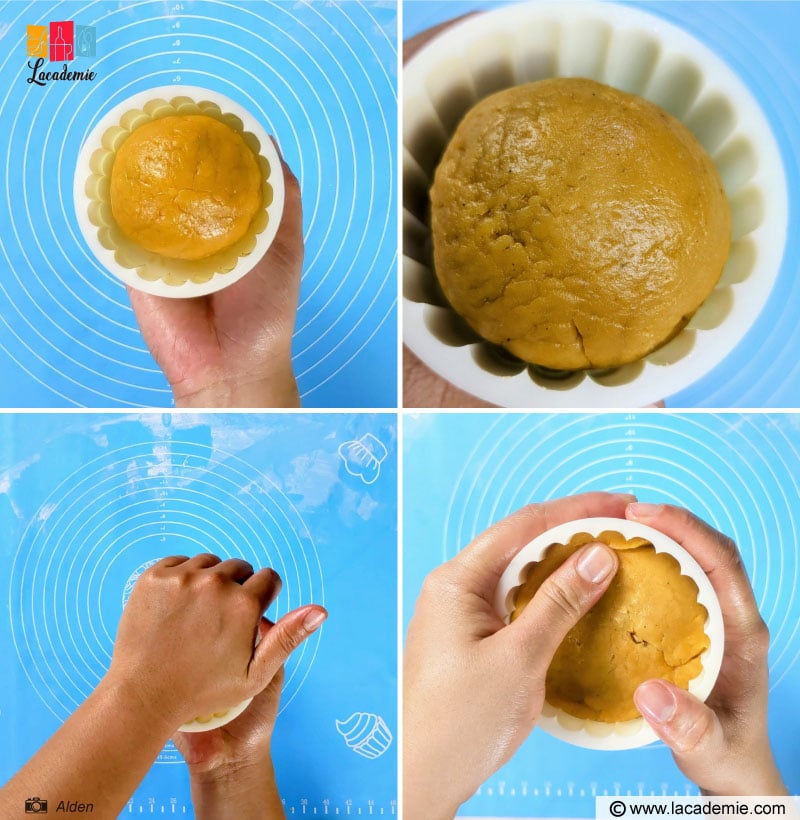
Brush a little oil on the mold. Doing this helps you remove the cake easier.
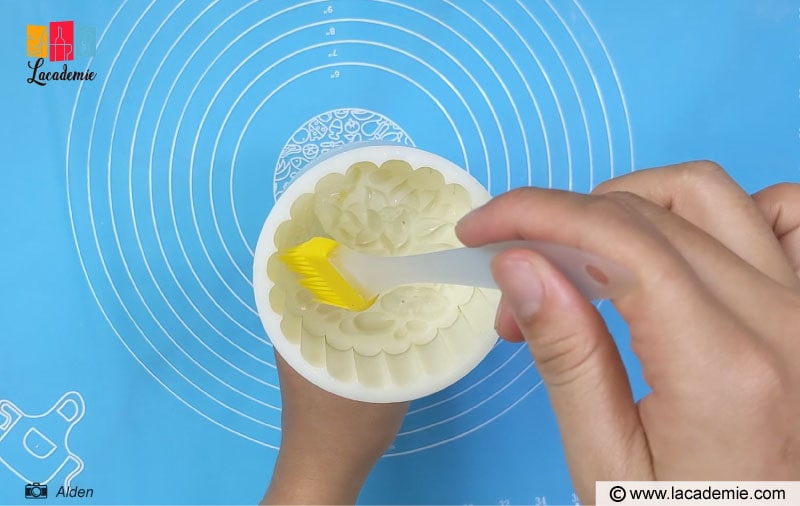
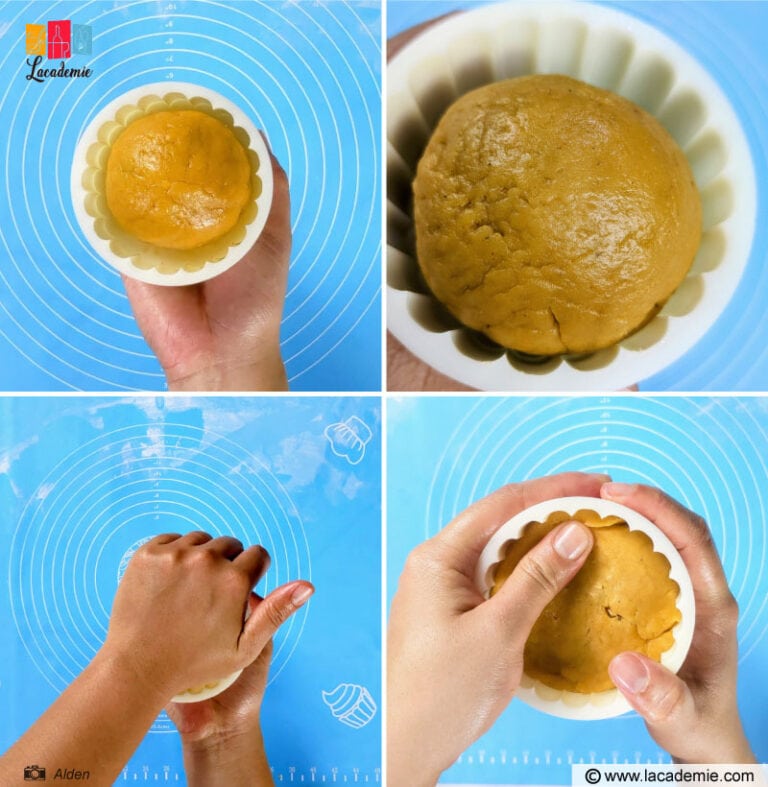
Put the dough into the mold.
Gently press the dough using your palm so that it sticks firmly to the mold. Then, use your fingers to gently press the edges. You should do this step carefully to ensure a beautifully shaped cake.
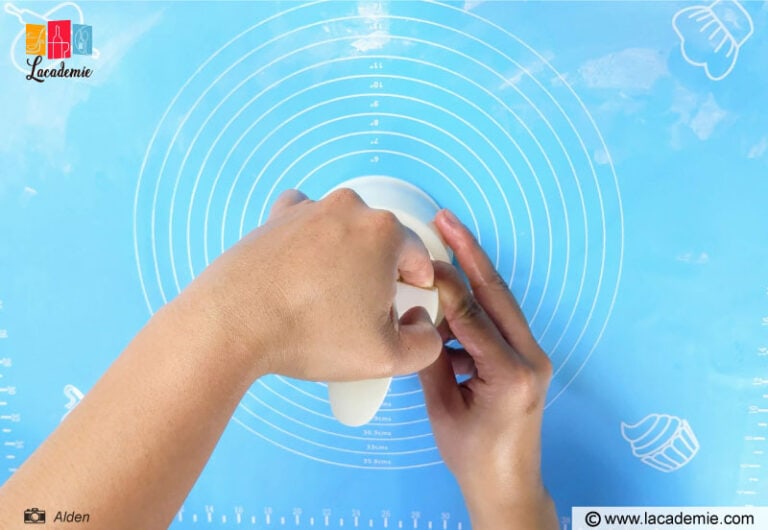
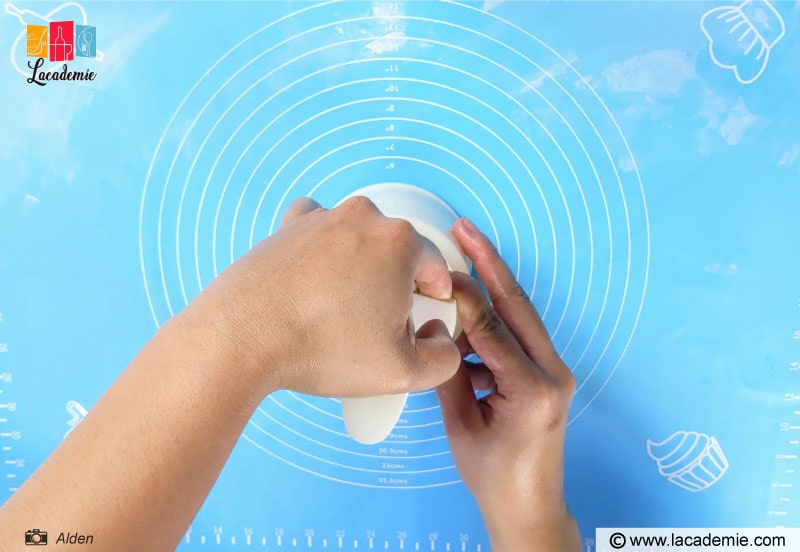
Turn the mold upside down. Hold it securely with your left hand and press down on it with your right hand. Hold for about 3 seconds and carefully remove the mold from the cake.
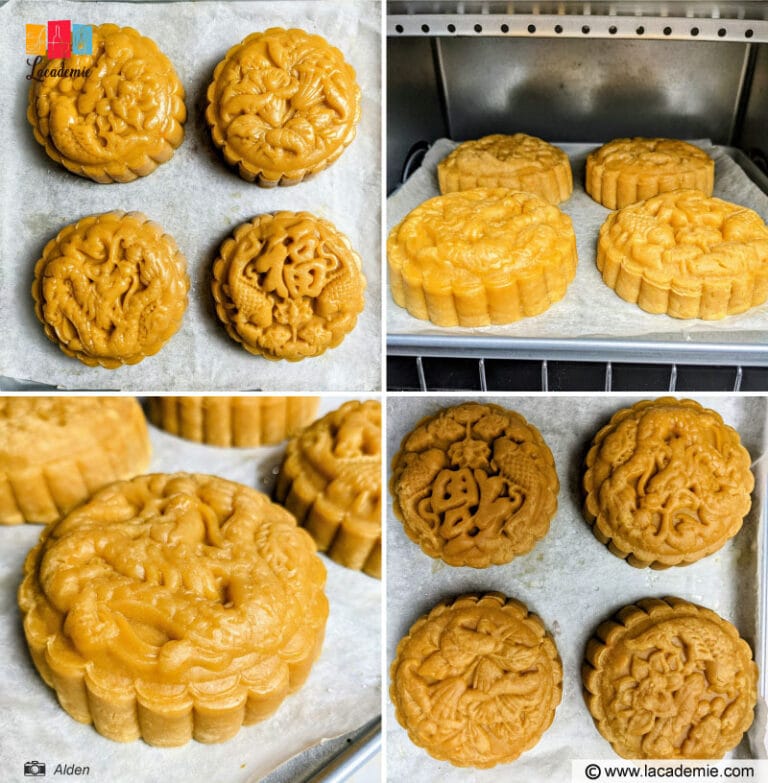
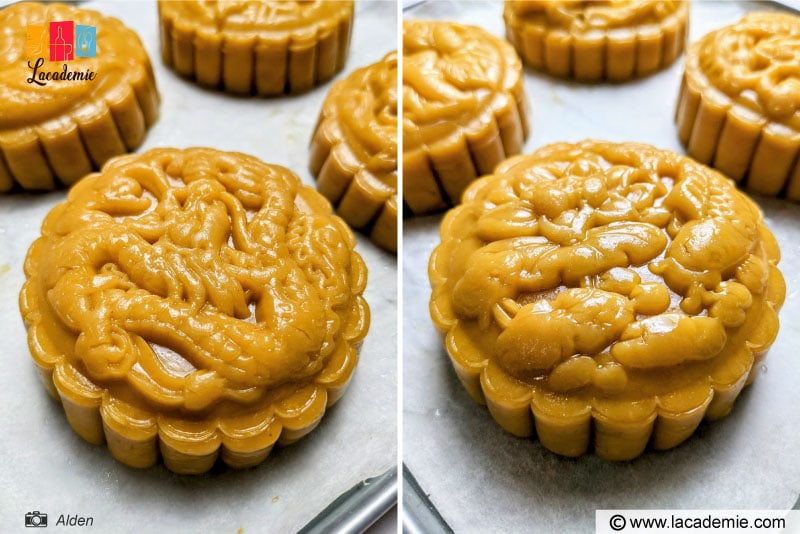
I recommend using multiple molds with different patterns to add to the visual appeal.
Step 11: Bake The Cakes
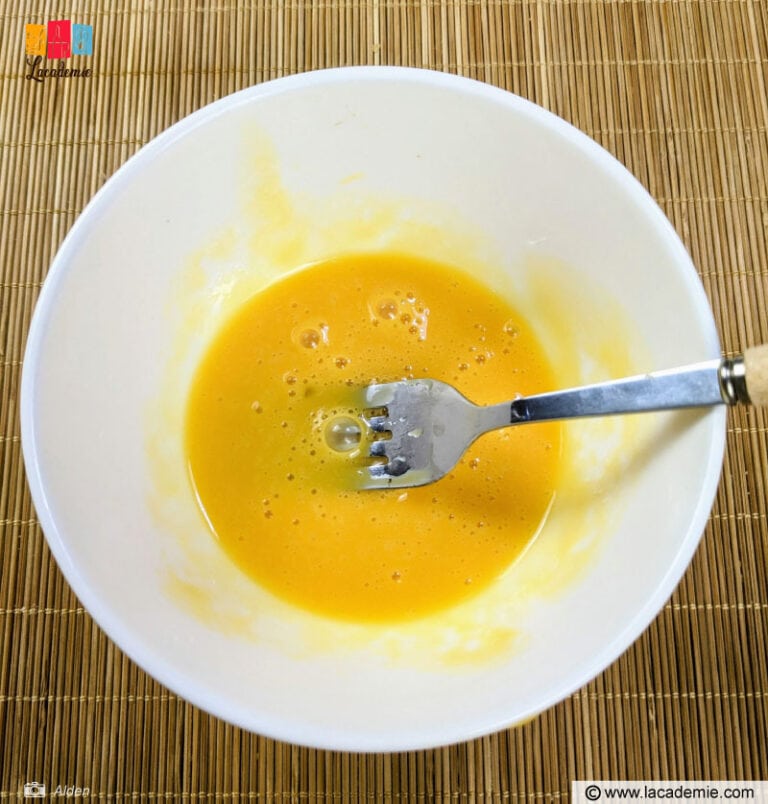
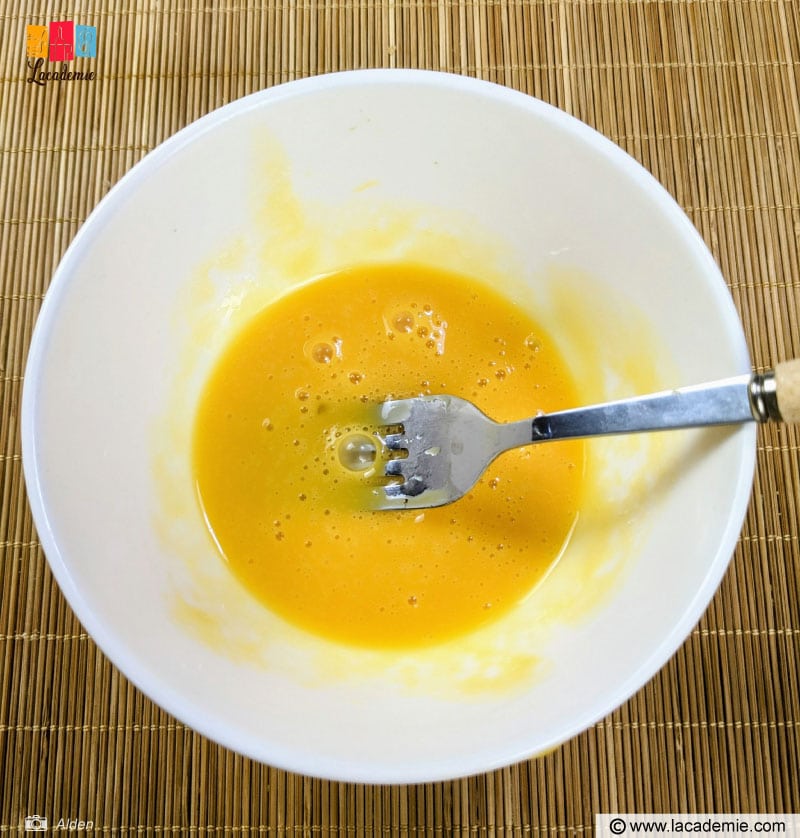
Combine 1 egg yolk with a little egg white and 1 teaspoon of sesame oil. Mix well using a fork.
Preheat the oven to 375 degrees F (about 15 minutes)
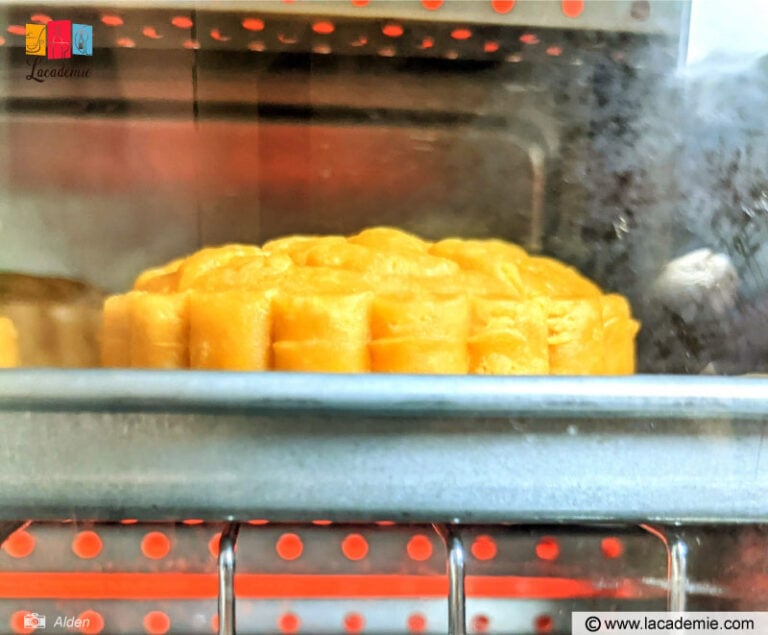
Line a baking tray with parchment paper. Place the cakes on the lined tray and spray a little water on them to prevent the crust from drying out. Bake the moon cakes for 15 minutes at 375 degrees F.
After that, take them out of the oven and spray them with water again. Allow the cakes to cool (about 15 to 20 minutes).
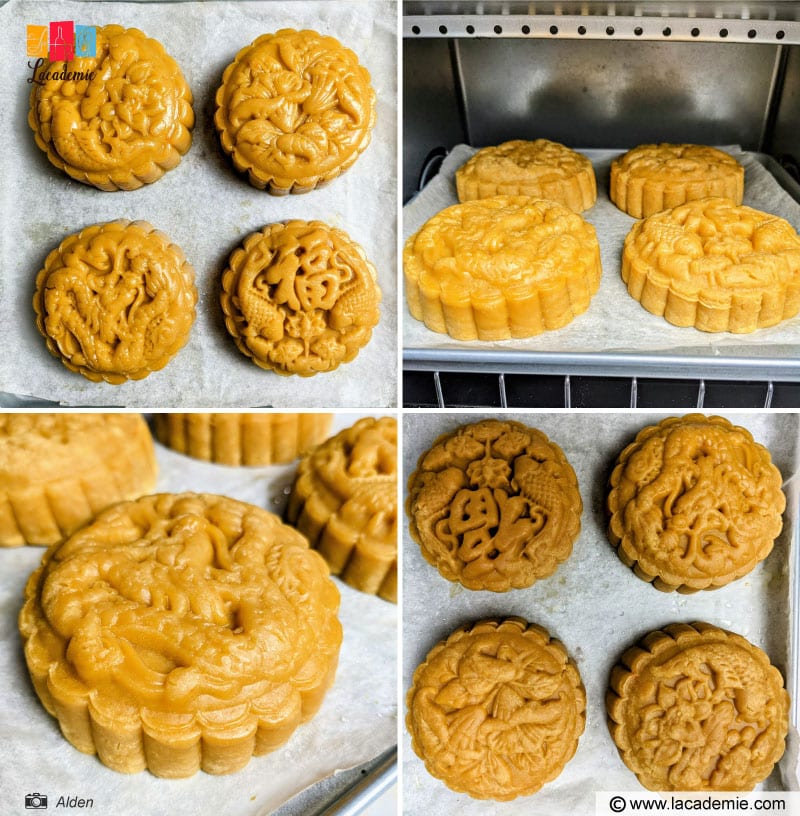
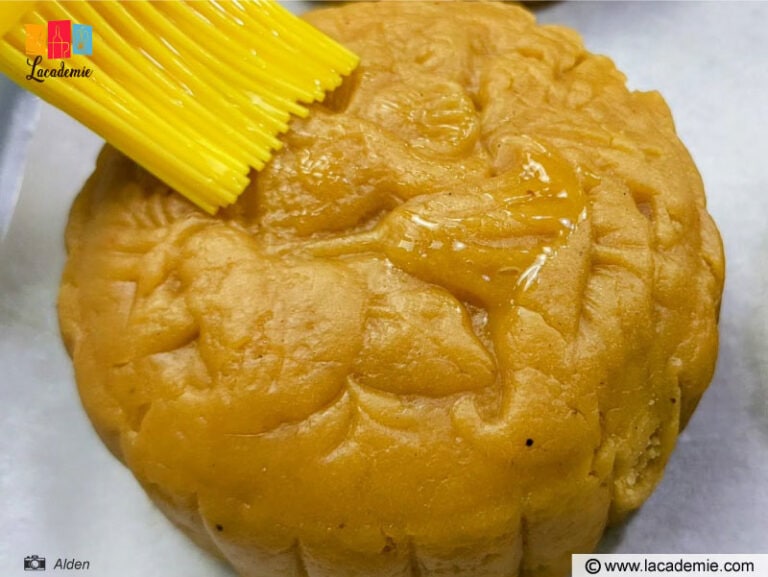
Next, brush a thin layer of the egg yolk and egg white mixture on the cakes. Don’t brush too much, as a thick layer of this mixture will cause the patterns on the surface to be less visible. Try your best to coat the cakes evenly.
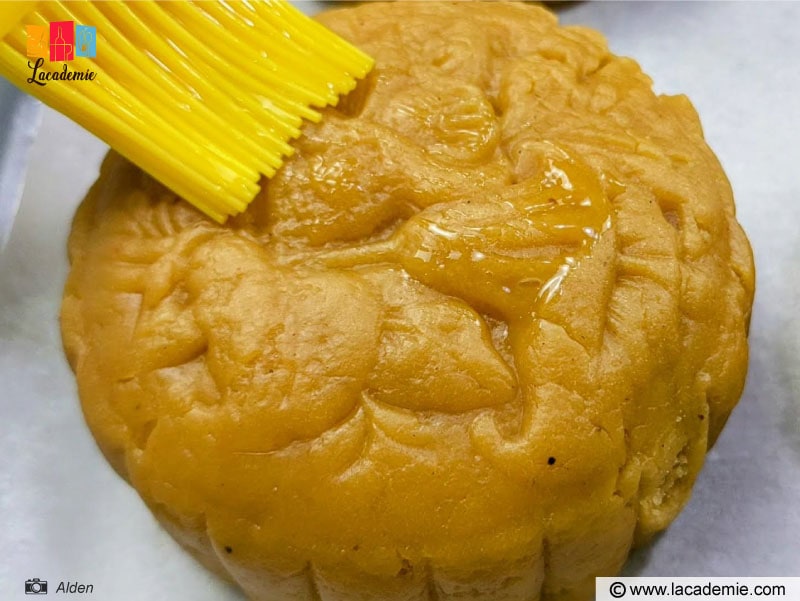
Bake the cakes at 375 degrees F for another 10 minutes.
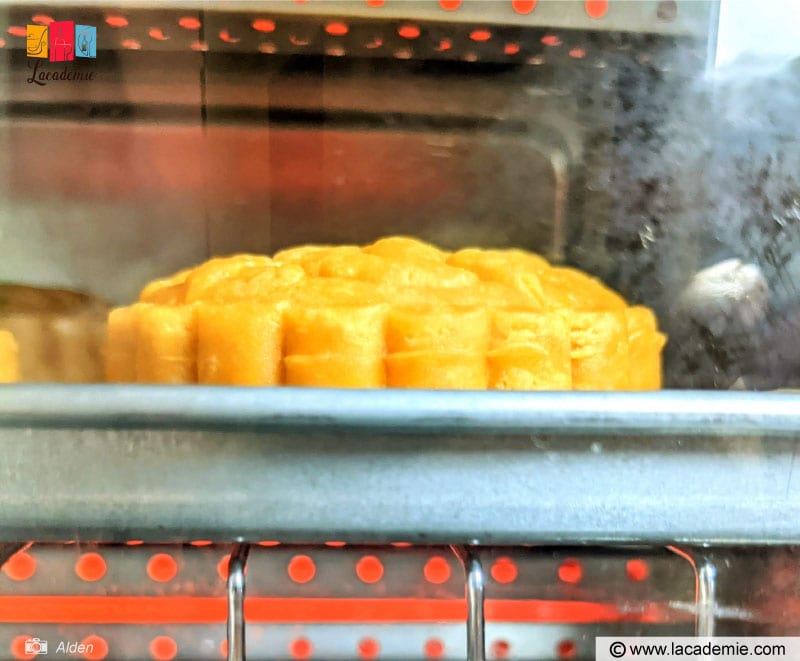
After the second round of baking, check if your cakes are cooked (the surface of the cake is almost golden, the sides are opaque, and the bottom is dry).
If they still need more time in the oven, spray them with a bit of water, wait for them to cool, and brush them with the egg mixture. Then, bake the cakes for 5 more minutes at 356 degrees F.
You can coat the surface 2 to 3 times with the egg yolk mixture. I don’t recommend more than 3 layers.
Step 12: Finish The Cakes
After baking, place the cakes on a cooling rack or a plate lined with paper towels. Allow them to cool.
When you first take the cakes out of the oven, they will be a bit tough and light yellow in color. Once you let them rest for about a day, they will turn golden brown and develop an appealing sheen. The patterns on the surface will also look sharper.
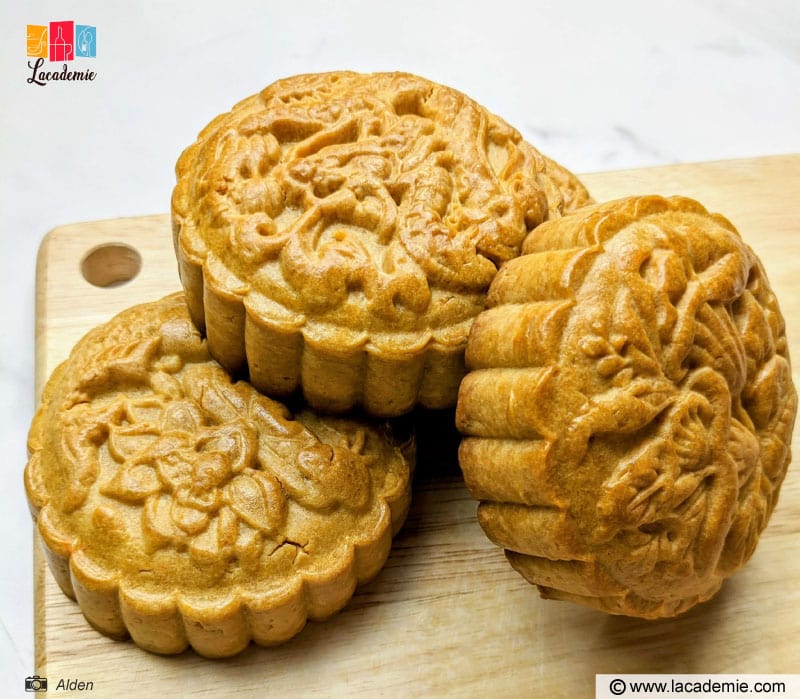
After 2 to 3 days, the sugar will start to fade in color. As the filling settles in, your cake will turn to a darker brown color and be glossier. They will also be softer, thanks to the oil from the dough.
What To Serve With Banh Trung Thu
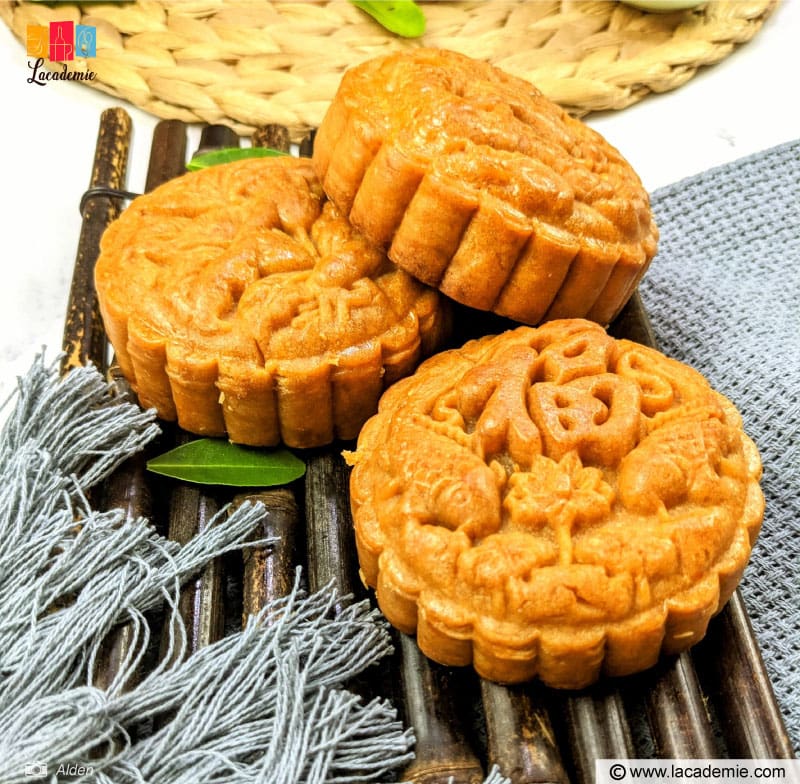
Green tea and mooncakes are a killer combination. The sweetness of the cakes goes perfectly well with green tea’s elegant flavor and aroma to create an irresistible aftertaste that lingers on your tongue.
Herbal teas, such as lemon, mint, lotus, chamomile, etc., are also ideal choices. The antioxidants in these kinds of tea are a great addition to your well-being.
Red wine and mooncakes form a unique pairing that combines Eastern and Western cuisines. The mild acrid taste of the wine accentuates Banh Trung Thu’s sugary flavor. Moreover, red wine provides plenty of vitamins, minerals, and amino acids, which help with digestion and reduce greasiness.
Last but not least, I love to enjoy my moon cakes with fruits, especially the ones with a slight sourness. My favorite picks are oranges, kiwis, and apples. These fruits will make the cakes less greasy, stimulate the digestive system, and reduce the amount of fat accumulated in your body.
However, I don’t recommend pairing Banh Trung Thu with sugary fruits such as mango or durian.
Tips For Cooking And Storing Mooncakes
If you need more tips for cooking these traditional cakes, this section will cover them all. Plus, you can also find the best way to store your Banh Trung Thu here.
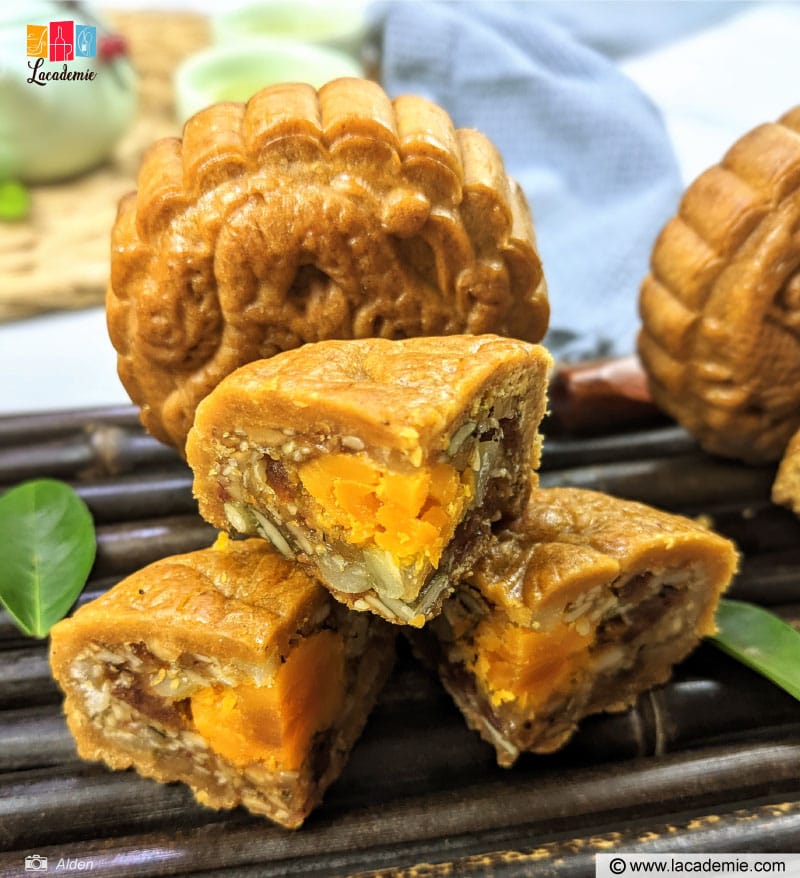
- Feel free to add more flavorful ingredients to the filling, like char siu pork, shredded chicken, ham, etc.
- The dough is what makes or breaks the cake’s crust. Make sure that you choose the highest-quality flour and follow the instructions carefully.
- Baking the cakes at high temperatures can cause swelling and affect the visibility of the decorative patterns.
- You should only brush the egg mixture on the cake when they’ve cooled as doing this while they are still hot will ruin the patterns.
- If you can’t find golden syrup in stores or don’t have time to make the homemade version, lye water is a great substitute in a pinch.
- When the cakes have come to room temperature, you should transfer them to a bag or box with a desiccant pack or store them in a cool place.
- You can store leftovers in a cool and dry place for 3 to 4 days. If you need to keep the cakes for more than 5 days, you should refrigerate them. Note that the flavor will decrease over time, so try to enjoy the cakes as soon as you can.
Have A Great Mid-Autumn Festival With Banh Trung Thu
Banh Trung Thu is the easiest way to experience the spirit of the Vietnamese Mid-Autumn festival no matter where you live. Moreover, there’s nothing to stop you from enjoying this fantastic dessert or tea-time snack whenever you feel like it.
Do these mooncakes suit your taste buds? Don’t hesitate to drop a comment to let me know your thoughts on this traditional sweet course. In addition, I’d really appreciate it if you could share this post with other dessert lovers you know. Thanks a lot, and see you again soon!
Nutrition Facts
10 servings per container
- Amount Per ServingCalories836
- % Daily Value *
- Total Fat
42.7g
65%
- Saturated Fat 9g 45%
- Cholesterol 534mg 178%
- Sodium 2308mg 97%
- Potassium 340mg 10%
- Total Carbohydrate
94.1g
32%
- Dietary Fiber 2.9g 8%
- Sugars 30.8g
- Protein 24.3g 48%
- Calcium 151%
- Iron 7%
- Vitamin D 4%
* The % Daily Value tells you how much a nutrient in a serving of food contributes to a daily diet. 2,000 calories a day is used for general nutrition advice.

